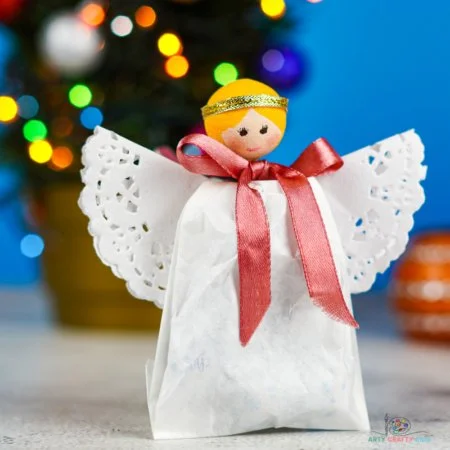
Creating an Angel Christmas Gift Bag is a delightful way to add some handmade charm to your holiday season. This easy craft project is not only beginner-friendly but also allows for creativity in customizing the design. It’s a fun gift bag that can be used for special treats and meaningful handmade gifts, making it a perfect DIY project for the holidays. With simple materials and quick steps, this craft is enjoyable for both kids and adults alike.
WHY YOU WILL LOVE THIS Angel Christmas Gift Bag
This Angel Christmas Gift Bag is a wonderful craft that combines simplicity, creativity, and practicality. Here are a few reasons why you will enjoy making it:
- Easy for Beginners: This project is designed with easy-to-follow steps, making it an excellent choice for those new to crafting.
- Uses Simple Materials: The materials required are common and inexpensive, making it a budget-friendly DIY option.
- Quick to Make: You can complete this craft in a short amount of time, perfect for busy holiday schedules.
- Great for Home Decor: This angel bag adds a lovely touch to your holiday decorations and is perfect for gifting.
- Easy to Customize: You can easily personalize the bag with different colors and decorations to match your style.
PROJECT DETAILS
Skill Level:
Beginner – This project is simple enough for anyone to tackle.
Estimated Time:
Approximately 1 hour – Quick to make, you can complete it in no time.
Approximate Cost:
Around $10 – The materials are affordable and can often be found at home or local craft stores.
Best For:
Great for holiday gifting, family activities, or DIY home decor.
Project Type:
A seasonal craft suitable for Christmas and creative gift-giving.
TOOLS AND EQUIPMENT NEEDED
Scissors
You will need scissors to cut the bag and paper doilies. Ensure they are sharp for clean cuts.
Sticky Tape
Sticky tape is essential for securing the openings of the bag and attaching the angel components.
Paintbrush
Used to apply the yellow and skin-colored acrylic paint on the paper ball, giving it a nice finish.
MATERIALS
Paper Lace Doily
This will form the wings of the angel. It will add an elegant touch to your gift bag.
Ribbon
You will need ribbon for the halo and the bow. Choose a color that matches your design.
Paper Ball or Large Wooden Bead
This will be the head of the angel. It’s crucial for the overall look of your gift bag.
Black and Pink Marker Pens
These will be used to draw facial features on the angel’s head. They add personality and detail.
Paper Bag
A standard gift bag that will hold your treats. You can use any size you prefer.
Wooden Stick
This stick will hold the angel’s head in place. It provides structure to the overall design.
Yellow and Skin Colored Acrylic Paint
These paints will be used to color the face and hair of the angel.
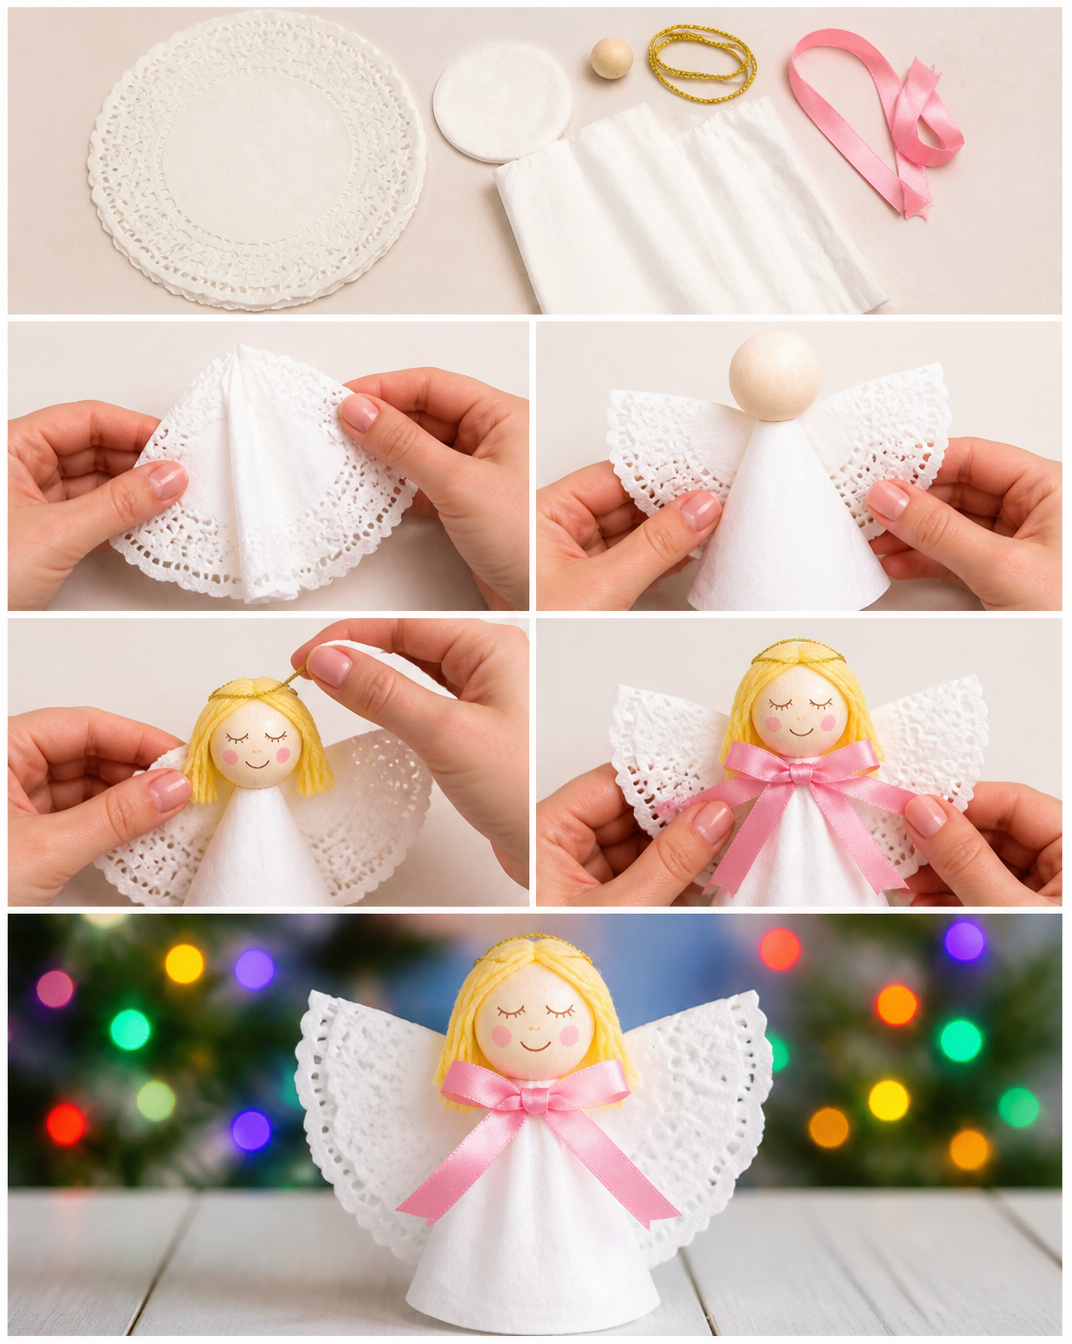
HOW TO MAKE Angel Christmas Gift Bag
Step 1: Glue the Stick
Apply glue to the tip of the wooden stick, spreading it evenly to ensure a strong bond.
Step 2: Secure the Stick
Stick the wooden stick into the paper ball, making sure it is secure. Once attached, paint the paper ball in a skin-tone color. Allow it to dry completely.
Step 3: Fill the Bag
Take your paper bag and fill it with a favorite holiday treat, such as candies or cookies. This will be the surprise inside your gift bag.
Step 4: Prepare the Bag Opening
Trim any excess material from the top of the bag, then fold the opening down and secure it with sticky tape to create a neat finish.
Step 5: Add Facial Features
Using the black and pink marker pens, paint the angel’s facial features on the ball. Feel free to add a touch of blusher to the cheeks for a cute look.
Step 6: Create the Halo
Cut a length of ribbon for the halo and attach it to the top of the angel’s head using glue.
Step 7: Attach the Head
Carefully attach the angel’s head to the back of the bag. Secure it firmly using sticky tape against the wooden stick.
Step 8: Add a Bow
Take another piece of ribbon and tie it into a bow around the top of the stick, covering the connection point between the bag and the angel’s head.
Step 9: Make Angel Wings
Fold the paper doilies in half to create the angel’s wings. This adds a lovely detail to your design.
Step 10: Attach the Wings
Finally, apply glue to the back of the angel’s head and affix the doilies to create beautiful wings.
TIPS AND TRICKS
- Choosing Materials: Look for materials in your home first. Re-purposed items can make unique gifts.
- Cutting and Gluing: Use sharp scissors for clean cuts. Be patient with glue; give it time to set properly.
- Painting Tips: When painting, use light coats. This prevents drips and gives a smoother finish.
- Avoid Common Mistakes: Be cautious when handling glue. Less is more, as too much can make the project messy.
- Saving Money: Purchase materials in bulk if possible. Often, craft stores have sales you can take advantage of.
- Making the Craft Last: Keep your finished angel in a cool, dry place, away from direct sunlight to preserve its colors.
- Work Safely: Always supervise children when using scissors or paints, ensuring a safe crafting environment.
VARIATIONS AND CUSTOMIZATION IDEAS
- Different Colors: Try using different colors for the angel’s hair and skin for a unique character.
- Seasonal Versions: Customize the bag for other occasions like birthdays or Valentine’s Day by changing the decorations.
- Size Variations: Create smaller or larger angels depending on the size of the gift bag you want to use.
- Different Patterns: Consider using patterned paper bags to add an extra flair to your project.
- Personalized Versions: Add names or personal messages using the markers on the bag itself for a personal touch.
Angel Christmas Gift Bag FAQ
How difficult is this project?
This project is beginner-friendly and suitable for all ages. It’s a simple craft that anyone can enjoy.
What materials do I need?
You will need common items such as paper doilies, a paper bag, markers, and paint. Most items are affordable and easy to find.
How long does this craft take?
You can expect to spend around 1 hour on this project. It’s quick and fun!
Can I store the finished angel gift bag?
Yes! Store it in a cool, dry place. Just handle it gently to keep it looking nice.
How can I customize my angel?
You can change colors, use different materials, or create seasonal variations to make your angel unique.
CONCLUSION
The Angel Christmas Gift Bag is an easy DIY project that combines creativity with functionality. Not only is it a simple craft that’s perfect for beginners, but it also makes a thoughtful handmade gift. The hands-on nature of this project allows for easy customization, making it a budget-friendly option for holiday gifting.
Whether you’re new to crafting or an experienced DIY enthusiast, this craft offers a chance to express your creativity in a fun way. So gather your materials and start making your own Angel Christmas Gift Bags today! We’d love to hear about your experiences and any unique customizations you come up with. Happy crafting!