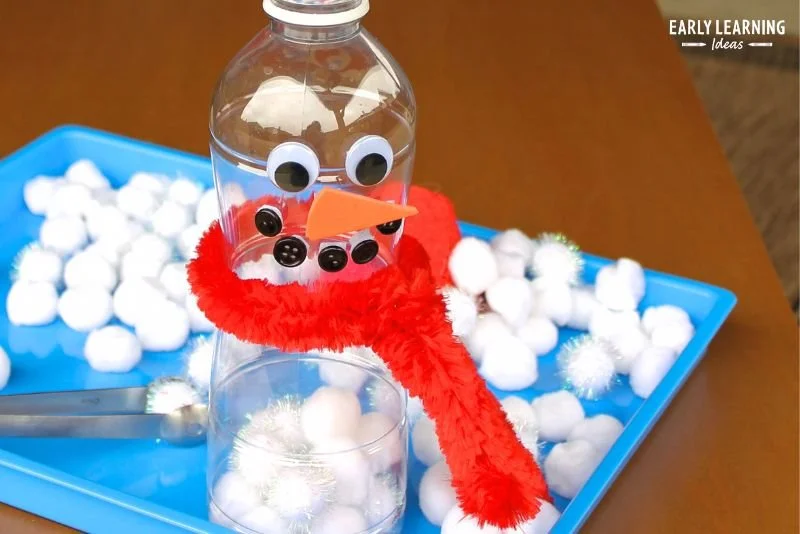
If you’re looking for an easy craft that brings the winter spirit indoors, making a snowman fine motor activity is a fantastic choice. This DIY project is perfect for anyone interested in simple crafts, especially during the holiday season. In this article, we’ll cover everything from materials needed to step-by-step instructions on creating your very own snowman. This engaging activity is not only a fun craft for beginners but also a creative way to hone fine motor skills.
WHY YOU WILL LOVE THIS Snowman Fine Motor Activity
One of the best things about making this snowman is how accessible it is for everyone, including kids and beginners. It uses straightforward materials that you likely already have at home, making it an excellent budget-friendly DIY project. Whether you want a cute decoration for your home or a handmade gift for a loved one, this easy craft idea fits the bill. The activity is also quick to complete, perfect for those who want to create something beautiful without spending a lot of time.
Moreover, this snowman fine motor activity is customizable. You can adjust the size, colors, and features to make it uniquely yours. It serves as an attractive piece of DIY home decor or a delightful addition to your holiday crafts.
PROJECT DETAILS
Skill Level
This project is beginner-friendly and suitable for crafters of all ages. It’s easy to follow along, making it a great introduction to crafting.
Estimated Time
You can complete this project in about 30 to 45 minutes, perfect for a quick after-school activity or a winter weekend craft session.
Approximate Cost
The estimated cost is minimal, primarily depending on whether you need to purchase any materials. Most supplies are inexpensive or can be sourced from home.
Best For
This project works well for family crafting activities, school projects, or even a crafting party with friends.
Project Type
This is a DIY home decor piece that’s also perfect as a holiday decoration or a creative gift option.
TOOLS AND EQUIPMENT NEEDED
Scissors
You will need a pair of scissors to cut the craft foam and the sock, making them essential for this project.
Hot Glue Gun
A hot glue gun is crucial for assembling various parts of the snowman securely. Just be careful, as it can get very hot.
Cutting Mat (optional)
If you’re working with craft foam or fabric, a cutting mat provides a safe surface to cut on and protects your work area.
MATERIALS
Plastic Quart Half and Half Bottle
This will form the base of your snowman. Make sure to clean it thoroughly before starting your craft.
Pair of Fuzzy Baby Socks
The socks will be transformed into the snowman’s hat. Their soft texture adds a cozy feel to your creation.
Empty Plastic Fruit Cup
This container will help create a rounded hat for your snowman. Ensure it’s clean before use.
Hot Glue
This strong adhesive will help secure all the snowman’s parts together.
Little Colored Puff Ball
You can use this to decorate the top of your snowman’s hat, adding a pop of color and fun.
Googly Eyes
These provide a whimsical touch to your snowman’s face, making it come alive.
5 Small Black Buttons
These will serve as the snowman’s mouth. You can substitute with beads or little stones if you prefer.
Piece of Craft Foam
Cut this into a triangle to make the snowman’s nose. You can pick any color you like!
Self Stick Hook and Loop Tape
This will help attach facial features easily and securely.
Big Fluffy Chenille Stem or Strip of Colorful Felt
This is for the snowman’s scarf, bringing a dash of color to your decoration.
Smallish White Puffballs
These will fill your snowman and make it look fluffy like snow.
HOW TO MAKE Snowman Fine Motor Activity
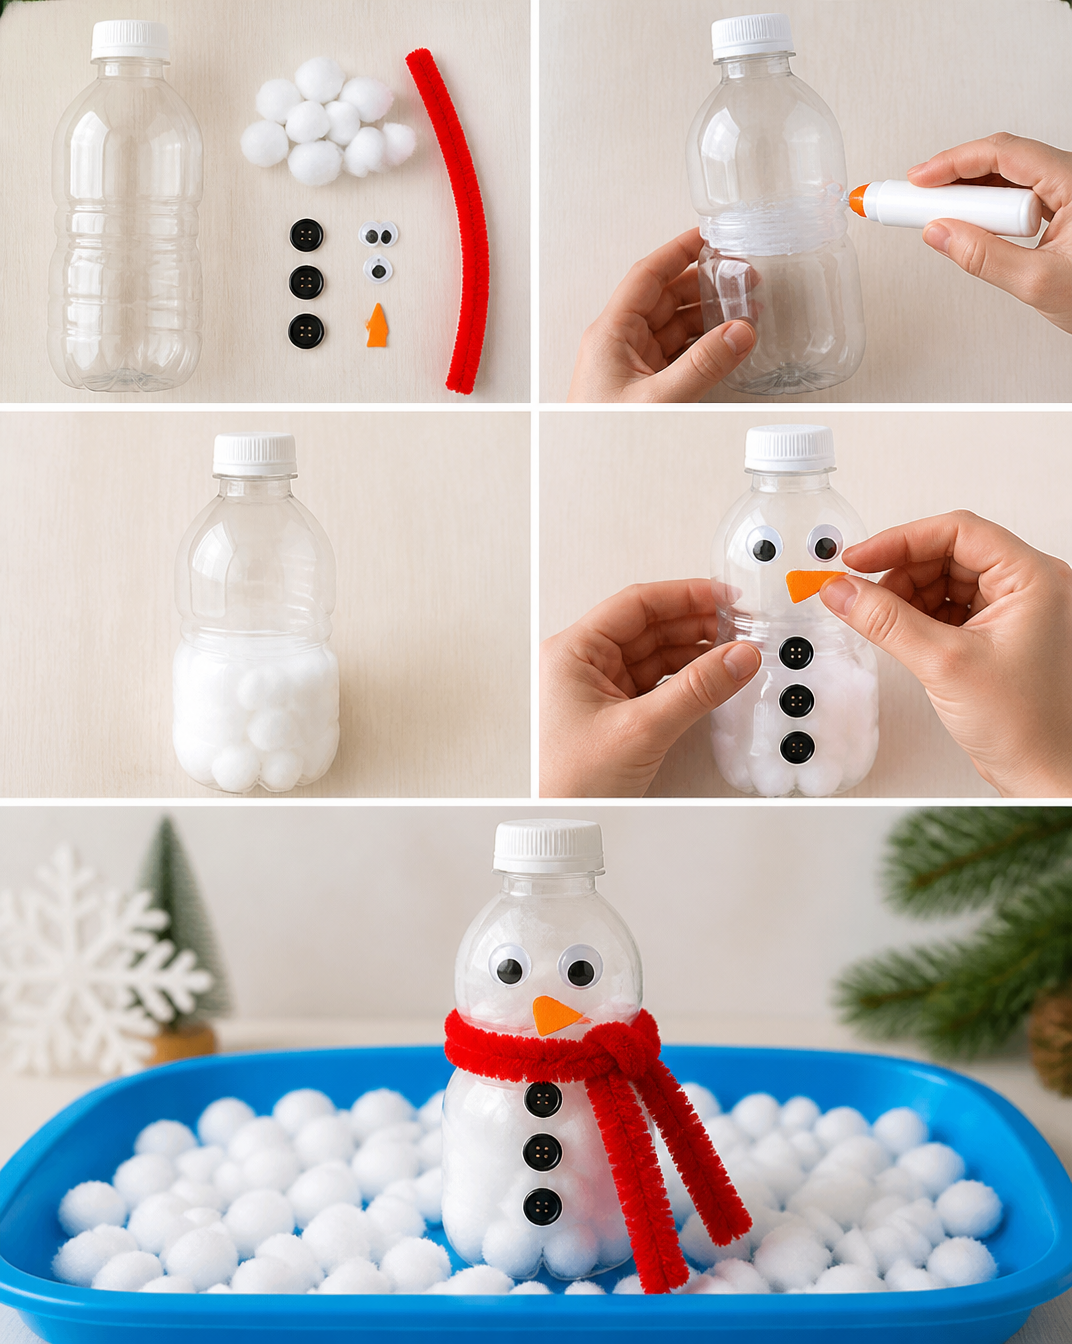
Step 1: Prepare the Snowman Body
Start by thoroughly cleaning the plastic quart half and half bottle. Make sure to cut off any labels. This will serve as the body of your snowman, giving it a classic snowy appearance.
Step 2: Make the Hat
For the hat, pull one of the fuzzy baby socks over the empty plastic fruit container. Roll up the edge around the opening to give it a finished look. Use hot glue to secure the sock in place. Don’t forget to add a colored puff ball on top for extra flair!
Step 3: Create the Snowman’s Face
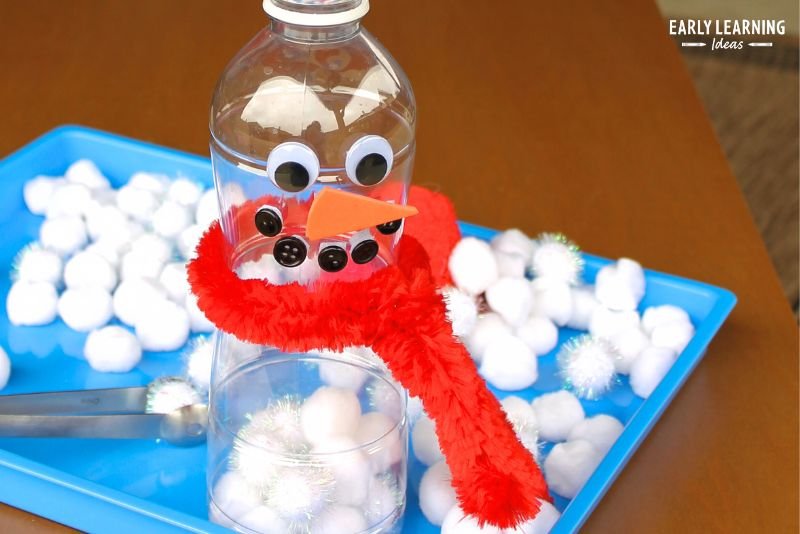
Now, it’s time to bring your snowman to life! Attach the googly eyes using hot glue. For the mouth, place 5 small black buttons, and make a nose from a triangle cut from the craft foam. Use self-stick hook and loop tape for easy attachment of these facial features.
Step 4: Add a Scarf
Make a scarf by cutting a piece of chenille stem or a strip of colorful felt. Wrap it around your snowman’s neck, tying it in place to add a pop of color.
Step 5: Assemble the Snowman
Attach your snowman’s facial features, wrap the scarf around its neck, and place the hat on top. This is where your snowman starts to come together, so have fun with it!
Step 6: Fill with Snow
To finish, fill your snowman with small white puffballs, mimicking freshly fallen snow. You can also shake it to empty and start filling again if you’d like to change up the texture!
TIPS AND TRICKS
- Choosing Materials: When selecting socks, pick ones in colors you love or that fit your decor theme.
- Gluing: Ensure the glue is hot enough to bond properly, but be cautious to avoid burns.
- Cutting: Use sharp scissors to make precise cuts on the craft foam and fabric for a cleaner look.
- Avoid Mistakes: Be careful when cutting the sock; you only need the fabric part for the hat.
- Storing Your Project: Keep your finished snowman in a dry place to protect it from moisture, which can affect the materials.
- Making It Last Longer: Opt for stronger glue when assembling decorations to extend the durability of your snowman.
- Safe Handling: Be cautious with the hot glue gun, especially if children are involved in the crafting process.
VARIATIONS AND CUSTOMIZATION IDEAS
- Color Scheme: Use socks in various colors to create a snowman family with a beautiful aesthetic.
- Sizes: Adjust the size of the bottle to create mini, medium, or large snowmen.
- Patterns: Decorate your snowman with patterned felt or fabric for a personalized touch.
- Seasonal Versions: Use red and green colors for Christmas or blue and white for winter-themed decor.
- Customized Features: Personalize your snowman by using different materials for the eyes, mouth, and scarf for a unique design.
Snowman Fine Motor Activity FAQ
1. How difficult is this snowman fine motor activity?
This project is beginner-friendly and easy to follow. It’s perfect for kids and first-time crafters.
2. What materials do I need for this project?
You’ll need items like a plastic quart bottle, baby socks, a fruit cup, hot glue, colored puff balls, googly eyes, buttons, craft foam, and a chenille stem or felt.
3. How long does it take to make the snowman?
You can finish this easy DIY project in about 30 to 45 minutes.
4. Can I store my finished snowman craft?
Yes, keep your snowman in a dry place to protect it from moisture. Ensure it is positioned securely to prevent it from falling.
5. Is this snowman safe for young children to make?
The project is safe under adult supervision, particularly when using hot glue. Make sure to keep small parts away from very young children.
CONCLUSION
Making a snowman fine motor activity is a fun and creative way to embrace the winter season. This easy craft requires simple materials, making it budget-friendly and accessible for beginners. Whether you want to use it as a home decor piece or give it as a handmade gift, this project allows for personalization and creativity.
We hope you try this delightful DIY project and share your experience or customization ideas with us! Happy crafting!