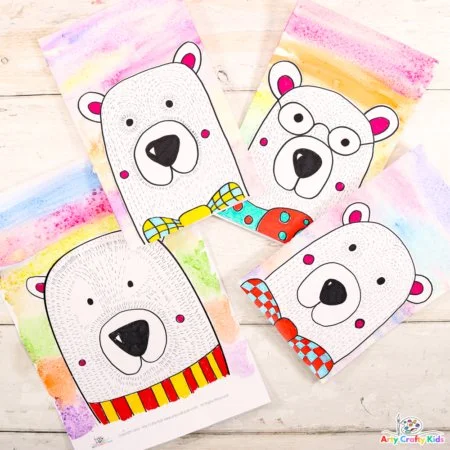
Do you want to create an adorable and easy polar bear drawing? The Easy Polar Bear Drawing and Art Project from Arty Crafty Kids is a fantastic choice for anyone looking for a simple craft that sparks creativity. This project is not only suitable for children but is also enjoyable for beginners and adults. With easy-to-follow instructions and minimal materials, this is a budget-friendly DIY craft that can brighten up your home, make for a cute gift, or serve as seasonal decor.
WHY YOU WILL LOVE THIS Easy Polar Bear Drawing and Art Project
This easy polar bear drawing is perfect for several reasons. First, it’s beginner-friendly, which means anyone can jump right in, regardless of their skill level. This project uses simple and affordable materials that you likely already have at home. Plus, it’s quick to make; you can create a charming piece of art in no time.
Another great aspect of this craft is its versatility. Not only will you have a delightful polar bear illustration, but you can use it for various purposes, such as home decor, holiday decorations, or even handmade gifts. You can also easily customize the project to reflect your personal style or seasonal themes, making it even more engaging and creative.
PROJECT DETAILS
Skill Level
Beginner-friendly – This project is designed for beginners of all ages and requires no advanced art skills.
Estimated Time
Approximately 30-45 minutes – You can complete the drawing and add the finishing touches in under an hour!
Approximate Cost
Budget-friendly – Most materials are likely to be found at home or can be obtained easily and cheaply.
Best For
Kids and adults – This craft is enjoyable for everyone, making it a great family activity.
Project Type
DIY Art Project – A creative DIY idea perfect for any age group that yields beautiful results.
TOOLS AND EQUIPMENT NEEDED
Scissors
Used for cutting out the polar bear drawing and creating shapes with paper.
Glue Stick
Used to attach the polar bear drawing to the watercolor background securely.
Paintbrush (optional)
If you’re using watercolors, a paintbrush is essential for applying the paint smoothly.
Mixing Palette or Plate (optional)
Helpful for mixing colors when using watercolor or other paints to achieve different shades.
MATERIALS
White Cardstock for Coloring the Polar Bear Printables
This sturdy paper works well for creating a durable and vibrant polar bear design.
White Cardstock for Drawing the Polar Bear
Plain white cardstock provides a clean canvas for outlining and coloring the polar bear.
White Paper for Printing the Step-by-Step Drawing Guide
Use a simple white printer paper to have the drawing guide handy, making it easy to follow along.
Black Marker Pen
Great for outlining the polar bear and adding bold details, ensuring that your drawing stands out.
Fine Tipped Black Pen
Use this for detailed work, such as drawing fur textures and adding intricate features to your polar bear.
Colored Marker Pens
Ideal for coloring various parts of your polar bear and can add fun accents to your drawing.
Watercolor or Mixed Media Paper
This type of paper is perfect for creating a colorful background, allowing for blending and texture when using paint.
Watercolor Paint
Essential for the background of your polar bear, watercolor paint allows for beautiful, soft color transitions.
Rock Salt
A unique element that you sprinkle onto wet watercolor, creating a stunning snow-like effect once the paint dries.
Scissors
Use scissors for cutting out your polar bear and other paper elements for the project.
Glue Stick
A quick-drying adhesive that helps you attach your polar bear to the background paper securely.
HOW TO MAKE Easy Polar Bear Drawing and Art Project
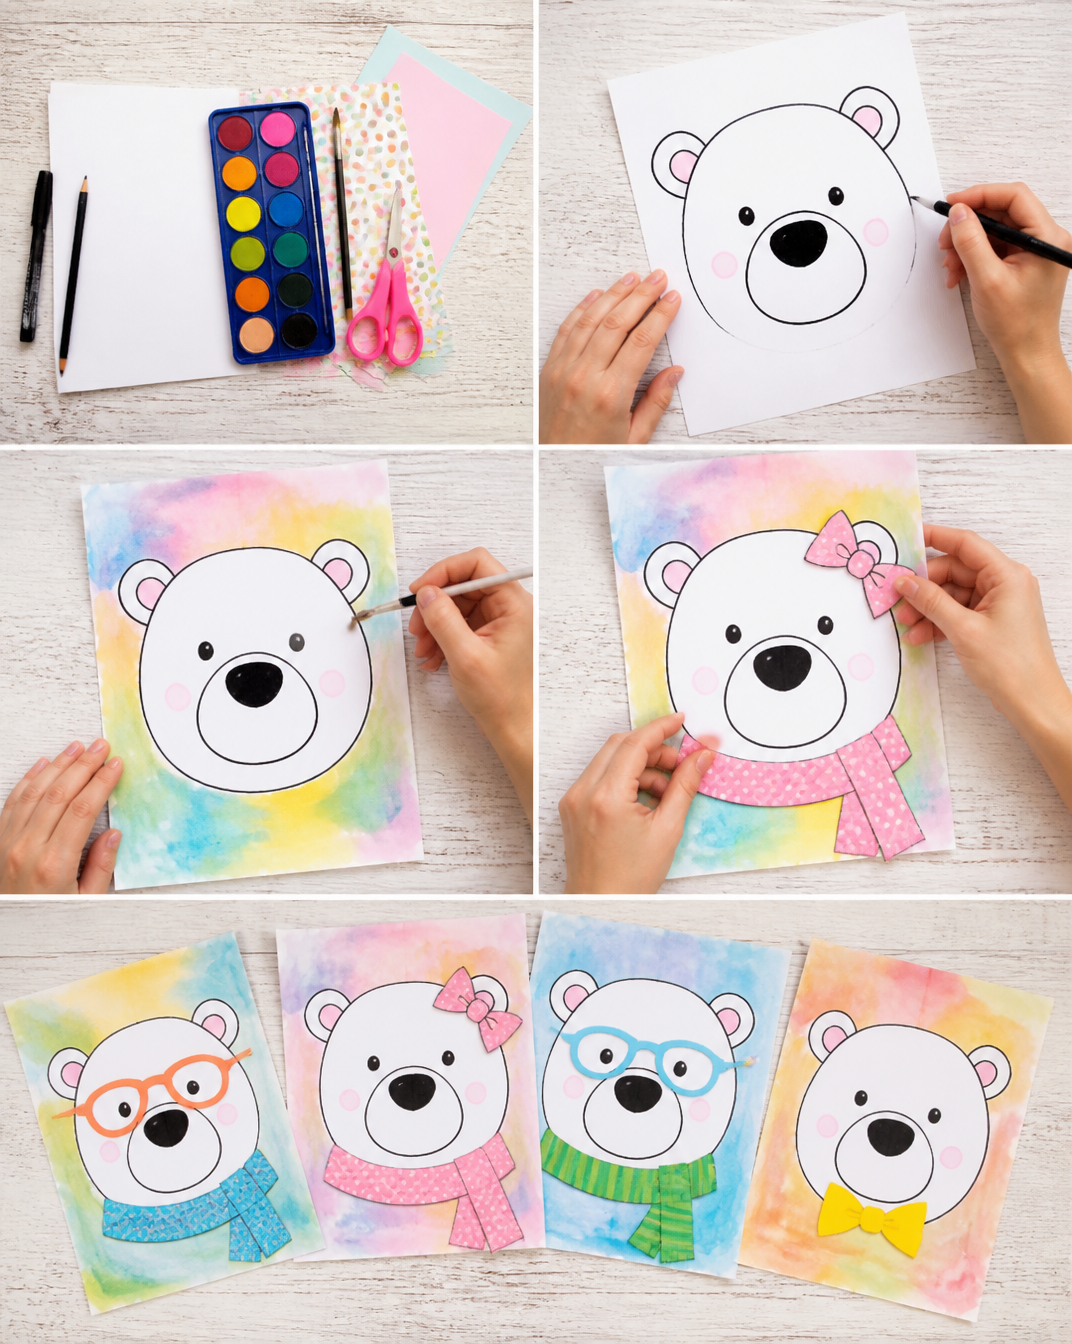
Step 1: Draw a Large Rainbow Arch
Start by drawing a large rainbow arch on the cardstock for the polar bear’s body. This simple shape serves as the foundation for the face and gives the polar bear a cute, round look.
Step 2: Draw and Color a Central Nose
Just beneath the arch, draw a large central nose. Remember to leave a white triangular space on the nose for a shine effect. Once outlined, use your black marker to fill in the nose.
Step 3: Frame the Nose
Next, draw a rounded, upside-down heart shape around the nose to create the muzzle. This adds dimensionality and character to your drawing.
Step 4: Add the Eyes and Ears
Draw round dotted eyes and small arches for ears on top of the head. These small details give your polar bear its adorable expression.
Step 5: Personalize the Drawing
Feel free to add your personal touch! You can draw extra features like a bow tie, scarf, or even accessories that add personality to your polar bear.
Step 6: Add Fine Marker Details
Using a fine-tipped black pen, incorporate fur details across the polar bear’s body and face. This adds texture and makes the bear look more lifelike.
Step 7: Frame Features with Dotted Lines
Frame the polar bear’s features with dotted lines to create depth. This is an easy way to give your drawing an inviting, playful touch.
Step 8: Add Color
Choose your favorite colored marker pens to fill in any details or add color accents around your polar bear. You can color the scarf or background elements.
Step 9: Create a Watercolor Background
Take your mixed media paper and use watercolor paint to create a colorful background. Apply the paint quickly, allowing colors to blend for a stunning effect.
Step 10: Sprinkle Rock Salt
While the paint is still wet, sprinkle rock salt on the painted surface. This will create a beautiful texture and effect once dried.
Step 11: Let Background Dry
Allow the watercolor background to dry completely. After it dries, brush off the salt to reveal the intriguing patterns it created.
Step 12: Cut Out the Polar Bear Drawing
Once your bear is drawn and your background is dry, use the scissors to cut out the polar bear drawing.
Step 13: Glue the Polar Bear Drawing
Finally, use the glue stick to attach the polar bear drawing to the dried watercolor background. Press down gently to ensure it sticks well.
TIPS AND TRICKS
-
Choosing Materials: Opt for high-quality paper that can hold water if you’re using watercolors, ensuring better results.
-
Cutting Techniques: Use sharp scissors for cleaner edges, especially when cutting out detailed shapes.
-
Avoid Common Mistakes: Start with light pencil strokes, making it easier to erase if you need to make adjustments to your drawing.
-
Enhancing the Finish: To give a professional look, consider framing your polar bear artwork in a simple frame after it dries. This DIY form of decor can elevate its presentation.
-
Making the Craft Last Longer: Store your finished artwork in a cool, dry place. Protect it from sunlight to prevent fading over time.
-
Working Safely: Ensure small children are supervised, especially while using scissors and markers. Use non-toxic materials when possible.
VARIATIONS AND CUSTOMIZATION IDEAS
-
Different Colors: Experiment with different shades for the polar bear or background to create unique effects.
-
Seasonal Versions: Incorporate seasonal themes such as using red and green for Christmas or pastel colors for spring.
-
Personalized Versions: Add names or special messages around the polar bear for a customized gift or greeting card.
-
Different Patterns: Instead of a solid color background, try creating a starry sky, winter wonderland, or even a summery scene with bright flowers.
-
Themed Designs: Create a series of animals for a themed display that can include penguins, seals, or other winter creatures.
Easy Polar Bear Drawing and Art Project FAQ
Is this project suitable for beginners?
Yes! The Easy Polar Bear Drawing and Art Project is designed as a beginner-friendly craft, making it perfect for all age groups.
How long will this craft take?
This project typically takes about 30-45 minutes to complete, making it a quick and enjoyable activity.
What materials do I need?
You will need white cardstock, colored markers, black pens, watercolor paints, rock salt, and a few basic tools like scissors and glue.
Can I use different materials?
Absolutely! You can experiment with various papers, colors, and even paint types. Just make sure they fit your project vision and safe for use.
How can I store my finished artwork?
Store your polar bear drawing in a flat position, away from direct sunlight, to prevent fading and ensure it lasts for years.
CONCLUSION
The Easy Polar Bear Drawing and Art Project offers a delightful way to engage in a creative, simple craft. Whether you’re an experienced artist or a beginner looking for a fun activity, this project checks all the boxes for creativity, ease of materials, and budget-friendly fun. Its versatility means you can use it for home decor, gifts, or festive celebrations.
Try this engaging craft with family or friends, and don’t forget to share your finished projects or customization ideas with others. Happy crafting!