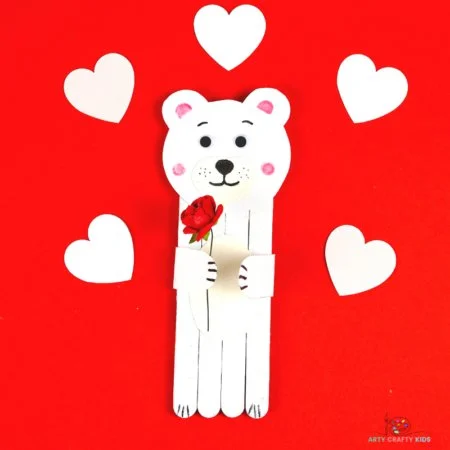
Making crafts can be a joyful way to celebrate the winter season, and what better way to do it than with a charming DIY project like the Popsicle Stick Polar Bear? This easy craft is perfect for beginners and uses simple materials you likely already have at home. It’s a wonderful addition to your holiday decorations or a delightful handmade gift. Join us as we explore this fun and creative DIY project!
WHY YOU WILL LOVE THIS Popsicle Stick Polar Bear
The Popsicle Stick Polar Bear is not just adorable; it’s an easy DIY project that appeals to crafters of all ages. Here are some reasons you’ll enjoy making this project:
- Easy for Beginners: This craft is beginner-friendly, making it perfect even for kids.
- Uses Simple Materials: You don’t need to purchase specialized supplies; most materials can be found at home or in your craft box.
- Budget-Friendly: Crafting doesn’t have to cost a fortune, and this project is a great example of a budget-friendly DIY.
- Quick to Make: You can complete this project in about an hour, making it ideal for a family craft day.
- Great for Home Decor: These cute polar bears make excellent additions to your winter decor.
- Great for Gifts: Create a personalized handmade gift that your friends and family will cherish.
- Easy to Customize: Feel free to add your personal touch by changing colors or adding embellishments.
PROJECT DETAILS
Skill Level
Beginner-friendly. This craft is suitable for all ages, including children with adult supervision.
Estimated Time
Approximately 1 hour. This includes drying time for paint and glue.
Approximate Cost
Low cost. Most of the materials are inexpensive or can be found around your home.
Best For
This project is perfect for winter or holiday crafts, school projects, or family activities.
Project Type
Seasonal craft. Ideal for winter-themed decor or holiday decorations.
TOOLS AND EQUIPMENT NEEDED
Scissors
Used to cut the popsicle sticks and any optional decoration elements.
Glue Stick
Essential for securing the popsicle sticks together and attaching other decorative parts.
Black and Pink Marker Pens
Used for adding details to the polar bear’s face and body, such as eyes, ears, and rosy cheeks.
MATERIALS
Popsicle Sticks x5
These will be the base structure for your polar bear. You will use four long sticks for the body and one to create the arms.
White Acrylic Paint
This works as the base color for your polar bear. It gives the sticks a cute, snowy appearance.
Artificial Flower (optional)
You can add this to brighten up your polar bear’s design. It can act as a lovely accessory.
Sticky Tape
Used to temporarily hold elements together while gluing.
Black and Pink Marker Pens
To bring your polar bear to life, use the black pen for eyes and mouth and the pink for cute cheeks.
Google Eyes (optional)
These can be glued on to give your polar bear an adorable look. If you don’t have them, you can simply draw eyes with the marker.
Glue Stick
This is the primary adhesive for your project, helping everything stick together securely.
Scissors
Useful for cutting the popsicle sticks and any decorative elements you wish to include.
HOW TO MAKE Popsicle Stick Polar Bear
Now that you have your materials ready, let’s get started on this fun DIY project!
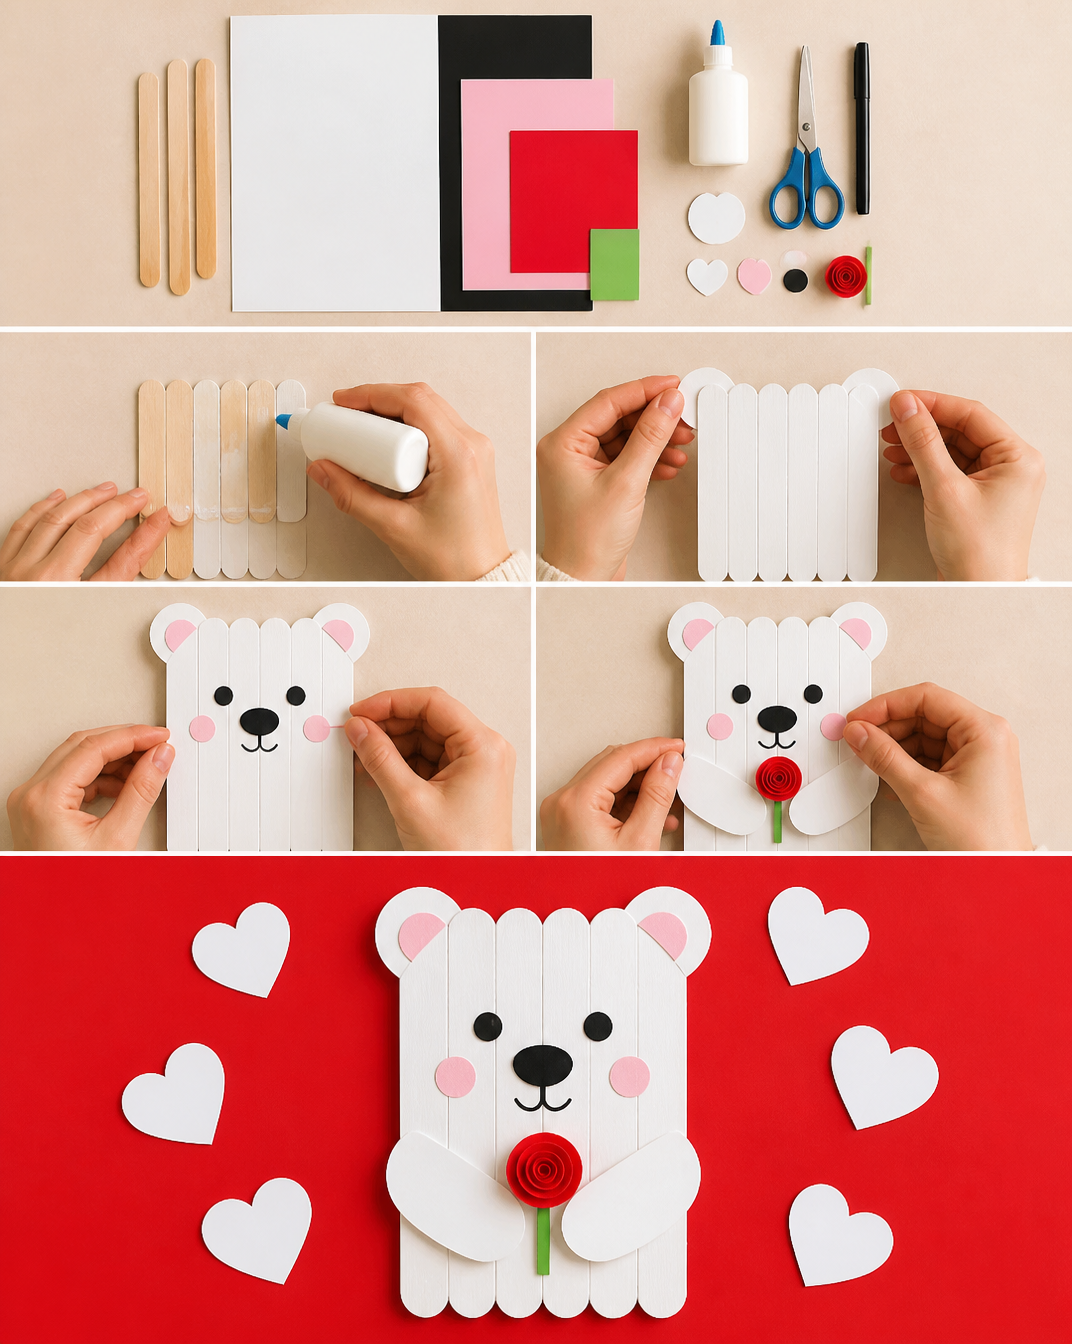
Step 1: Cut the Popsicle Stick
Start by cutting one popsicle stick into two smaller pieces. These pieces should be long enough to stretch across the four popsicle sticks that you’ll arrange side by side. This will act as the arms of your polar bear.
Step 2: Paint the Popsicle Sticks
Next, take the remaining four popsicle sticks and paint them white using the white acrylic paint. Make sure to cover them evenly. Once painted, set them aside to dry completely.
Step 3: Arrange the Popsicle Sticks
After your painted sticks are dry, arrange the four long popsicle sticks side by side in a horizontal line. This will form the body of your polar bear.
Step 4: Secure the Body
Take one of the smaller pieces you cut earlier and apply a generous amount of glue to one side. Place this across the four sticks to hold them in place. Then, use the second short stick and glue it across the sticks as well to reinforce the structure.
Step 5: Create the Bear’s Face
Now it’s time to design your polar bear’s face! Cut out the face elements from paper or use additional popsicle sticks if you prefer. You’ll need an oval shape for the head and other shapes for the ears.
Step 6: Assemble the Face
Use the glue stick to secure the oval shape (the head) to the top of the popsicle structure. Add googly eyes if you have them, or draw eyes with the black marker. Then, create a smile or other facial features with the black and pink markers.
Step 7: Add Claw Detailing
To give your polar bear some claw detailing, draw small shapes onto the ends of the popsicle sticks that will serve as the arms.
Step 8: Optional Decorative Touch
If you’d like, you can glue the artificial flower or a small heart to one of the bear’s arms. This will add a cheerful touch to your bear.
Step 9: Bend the Arms
To complete your polar bear, create a small fold at the end of each arm. Glue these folds to the back of the popsicle body so the arms bend around to the front, meeting across the bear’s tummy area.
TIPS AND TRICKS
- Choosing Materials: Look around your home for supplies! Many items can be upcycled for this project.
- Cutting and Gluing: Be careful when using scissors and apply glue in moderation to avoid messes.
- Avoiding Common Mistakes: Make sure to wait for the paint to dry fully before gluing to ensure that your craft is sturdy.
- Customization: Feel free to add additional features like scarves made from fabric scraps or hats made from paper.
- Storing Your Craft: Keep your finished polar bear in a cool, dry place. If it gets dusty, gently wipe it with a dry cloth.
- Making a Craft Last Longer: To protect your polar bear from damage, consider spraying it with a clear acrylic sealer.
- Working Safely: Adults should supervise children, especially when using scissors and glue.
VARIATIONS AND CUSTOMIZATION IDEAS
- Different Colors: Instead of white, experiment with other polar bear colors or create a rainbow bear!
- Seasonal Versions: Try making a penguin by using different colors and a round base instead of a rectangular one.
- Different Sizes: Make mini versions to create a family of polar bears to decorate your home.
- Personalized Versions: Add initials or names to the bear’s body for a personalized touch.
- Fun Accessories: Use fabric scraps or felt to create hats or scarves for your polar bear.
Popsicle Stick Polar Bear FAQ
How difficult is this craft?
This craft is beginner-friendly and designed for all ages. It’s simple enough for kids with some adult supervision.
What materials do I need?
The main materials include popsicle sticks, white acrylic paint, markers, glue, and optionally, googly eyes and decorations like artificial flowers or paper hearts.
How should I store my finished craft?
Store your Popsicle Stick Polar Bear in a cool, dry place. If needed, dust it off with a dry cloth to keep it looking nice.
How long does this project take?
You can expect to spend about an hour completing the project, including drying time for the paint and glue.
Can I customize my polar bear?
Absolutely! You can change colors, add accessories, or even create a different animal version using the same technique.
CONCLUSION
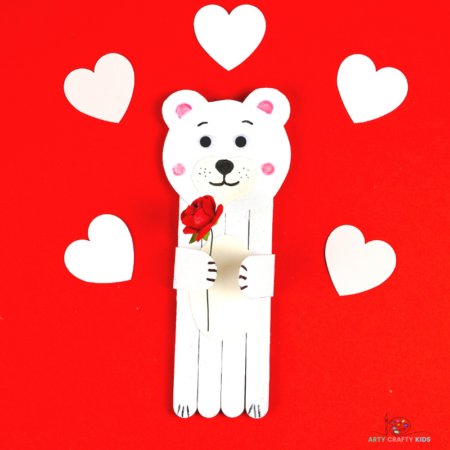
The Popsicle Stick Polar Bear is a delightful and creative DIY project suitable for all ages. It is easy to make, uses everyday materials, and is a budget-friendly craft perfect for holiday decorating or gifting. With plenty of customization options, you can truly make this project your own. We encourage you to try making this cute winter craft and share your experiences or any unique variations you’ve made! Happy crafting!