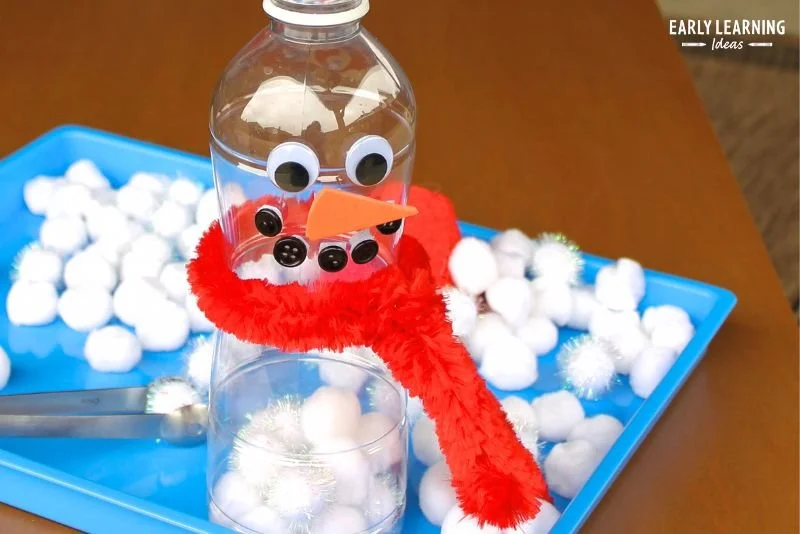
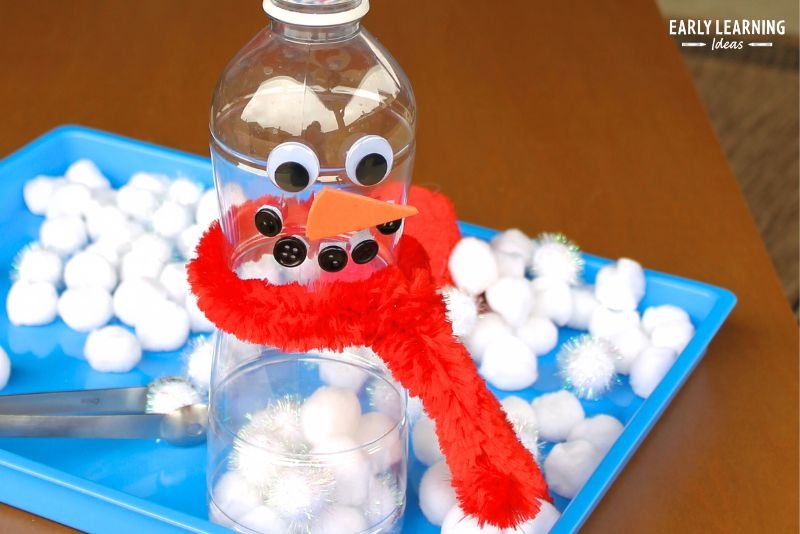
Winter Theme Ideas: Make A Snowman Fine Motor Activity is a delightful and engaging DIY project perfect for all ages. This easy craft allows you to create a fun snowman using simple, everyday materials. It’s not only a great way to enhance fine motor skills, but it’s also a creative DIY idea for holiday decorations, handmade gifts, or just a playful winter activity. Let’s get started on making your own snowman friends!
WHY YOU WILL LOVE THIS MAKE A SNOWMAN FINE MOTOR ACTIVITY
This snowman craft is perfect for those who are looking for an easy and enjoyable activity. Here are the reasons why you’ll love making this snowman:
- Easy for beginners: The project uses simple instructions that are easy to follow.
- Uses simple materials: Most materials are common household items, making this a budget-friendly craft.
- Great for home decor: Once completed, the snowman can brighten up your home during the winter season.
- Easy to customize: You can personalize your snowman with different colors and decorations.
- Perfect for kids’ activities: It’s a fun way for kids to develop fine motor skills while being creative.
PROJECT DETAILS
Skill Level
Beginner-friendly. This project is suitable for all skill levels, including children supervised by adults.
Estimated Time
About 30-45 minutes, depending on your experience and how much detail you want to add.
Approximate Cost
Very low cost, as most materials can be found at home or are inexpensive to buy.
Best For
Great for winter-themed parties, family activities at home, or as a decorative piece during the holiday season.
Project Type
This is a DIY seasonal craft that can be used for home decor or as a fun winter activity.
TOOLS AND EQUIPMENT NEEDED
Hot Glue Gun
You will need a hot glue gun to attach the various parts of the snowman together securely.
Scissors
Use scissors to cut materials such as craft foam or chenille stems.
Craft Knife (Optional)
If you prefer more precision when cutting labels off the plastic bottles, a craft knife may be used, but ensure that it’s handled safely.
MATERIALS
Plastic Quart Half and Half Bottles
These will serve as the base for your snowman. They provide a sturdy structure and can be filled to simulate snow.
Fuzzy Baby Socks
These socks will be used to create the snowman’s hat. They add a warm and fuzzy texture.
Empty Plastic Fruit Cup
This cup will be the foundation for the snowman’s hat, providing support and stability.
Hot Glue
Essential for attaching different parts securely.
Colored Puff Ball
To top the hat and add a playful touch to your snowman’s appearance.
Googly Eyes
These fun eyes will bring your snowman to life.
Small Black Buttons
Use these for the snowman’s mouth, adding character and charm.
Craft Foam
This will be used for the nose. You can cut it into a triangle to give your snowman some personality.
Self Stick Hook and Loop Tape
This makes the nose removable, allowing for fun interaction with the snowman.
Big Fluffy Chenille Stem or Colorful Felt Strip
This will be used to create a scarf, adding style to your snowman.
Smallish White Puffballs
These puffballs will fill the quart bottle, simulating fluffy snow.
HOW TO MAKE MAKE A SNOWMAN FINE MOTOR ACTIVITY
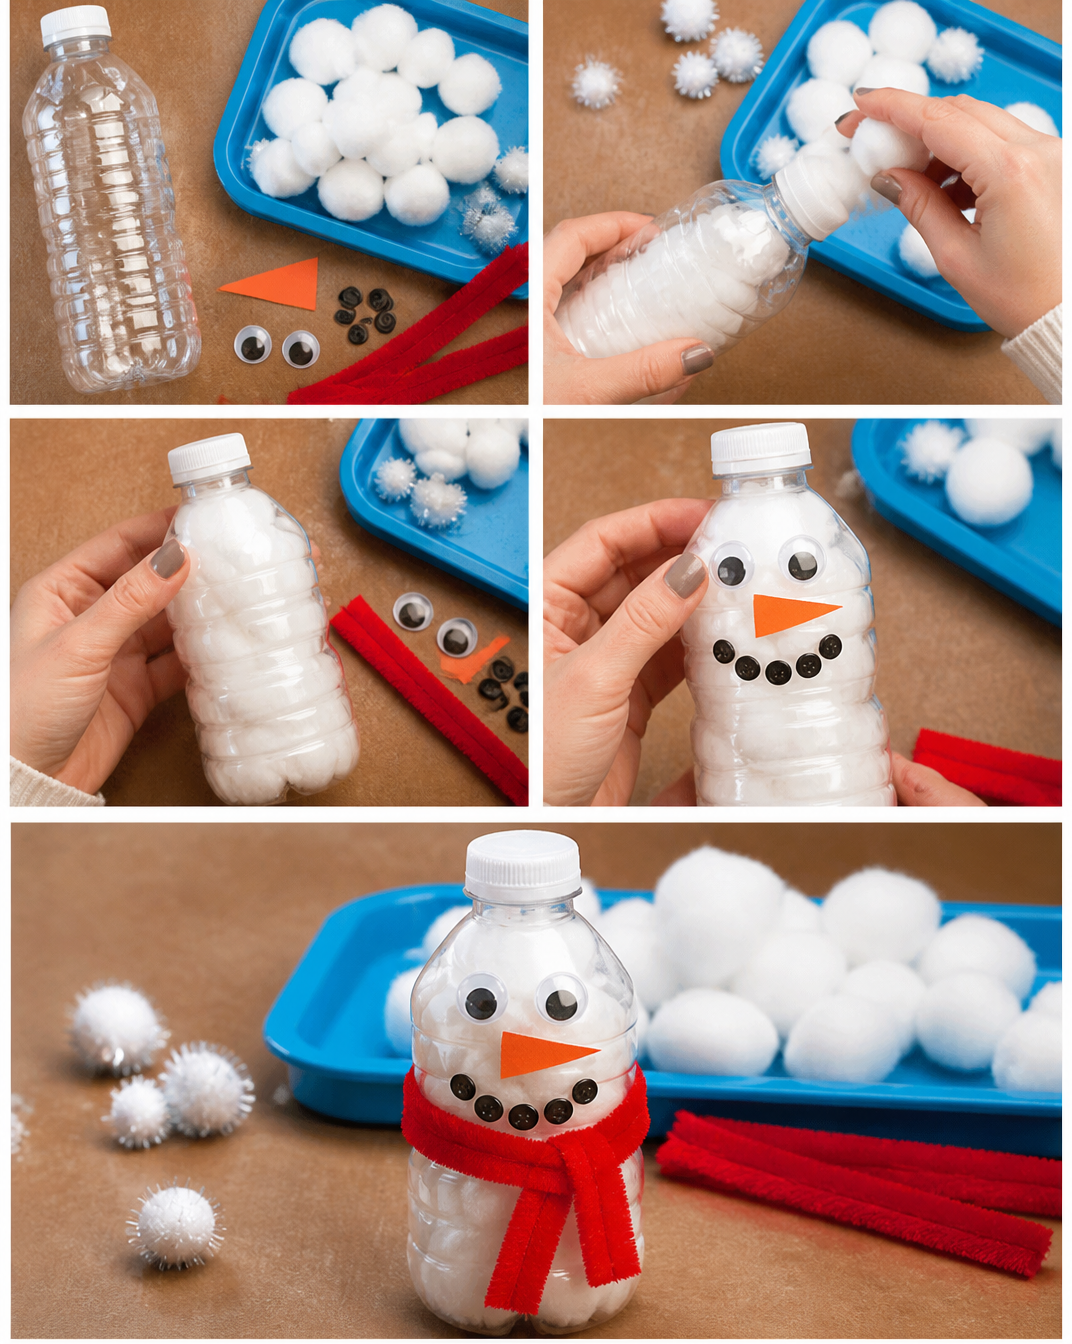
Step 1: Prepare the Bottles
Begin by cleaning the plastic quart half and half bottles thoroughly. Cut off any plastic labels to ensure a clean look.
Step 2: Create the Hat
Take the fuzzy baby sock and put it over the empty plastic fruit cup. Roll up the edge of the sock and secure it with hot glue. To finish the hat, attach a colored puff ball on top.
Step 3: Assemble the Face
Using hot glue, attach the googly eyes and small black buttons to the bottle to create the snowman’s face. Cut a triangle from the craft foam for the nose and attach it using the self-stick hook and loop tape. This allows kids to remove and replace the nose for extra fun!
Step 4: Create a Scarf
Cut a piece from the big fluffy chenille stem or a colorful felt strip to make a scarf. Wrap it around the neck of the bottle just below where the cap would be.
Step 5: Fill the Bottle
Carefully fill the quart bottle with smallish white puffballs to create the look of fluffy snow.
Step 6: Attach the Facial Features
Final touches involve securing all facial features and the scarf, ensuring everything is attached well. Let kids shake out the “snow” to start afresh with each play!
TIPS AND TRICKS
- Choosing Materials: Opt for clean recyclables. Ensure your plastic bottles are clean to avoid unwanted residues.
- Gluing Safety: Always supervise children when using hot glue. Consider using child-safe glue for younger kids.
- Customization: Experiment with different sock patterns and colors for a unique look. You can also use different objects as a hat base, like small cans or jars.
- Avoiding Common Mistakes: Make sure to apply the glue generously to avoid parts falling off later.
- Better Finish: Ensure all ends of materials (like the sock) are glued securely. This will give your snowman a neat finish.
- Saving Money: Use items you already have at home, like leftover craft supplies or even old socks!
- Durability: To increase longevity, avoid leaving the snowman outside in wet conditions.
VARIATIONS AND CUSTOMIZATION IDEAS
- Different Colors: Use different shades of puff balls to represent various styles of snow.
- Seasonal Versions: Get creative with holiday-themed decorations by adding small ornaments or themed scarves.
- Sizes and Shapes: Make smaller snowmen for a fun collection or add more bottles for a larger, unique snowman.
- Personalized Versions: Let kids draw or paint on the bottle or decorate with stickers for added personalization.
- Different Materials: Explore using fabric scraps, old hats or scarves, or other creative odds and ends to build your snowman.
MAKE A SNOWMAN FINE MOTOR ACTIVITY FAQ
Q1: Is this project suitable for young children?
Yes, this craft is beginner-friendly and suitable for children with adult supervision, especially when using a hot glue gun.
Q2: What materials do I need to prepare in advance?
Gather plastic bottles, socks, fruit cups, googly eyes, buttons, craft foam, puffballs, and scissors.
Q3: How long does it take to make this snowman?
The entire project will take about 30-45 minutes, depending on the level of detail and the number of snowmen you make.
Q4: Can I store the snowman after making it?
Yes! Store your snowman in a cool, dry place. It can last a long time if handled gently.
Q5: How can I clean the snowman?
Use a damp cloth to wipe dirt from the outside gently. Avoid soaking it in water.
CONCLUSION
Making a snowman fine motor activity is an enjoyable and simple craft that anyone can create. Not only is it easy to assemble, but it also offers a unique way to bring the joy of winter into your home. This project allows for creativity and personalization and is perfect for holiday decorations or as a handmade gift. So gather your materials, enjoy the crafting time, and feel free to share your own snowman creations and customization ideas! Happy crafting!