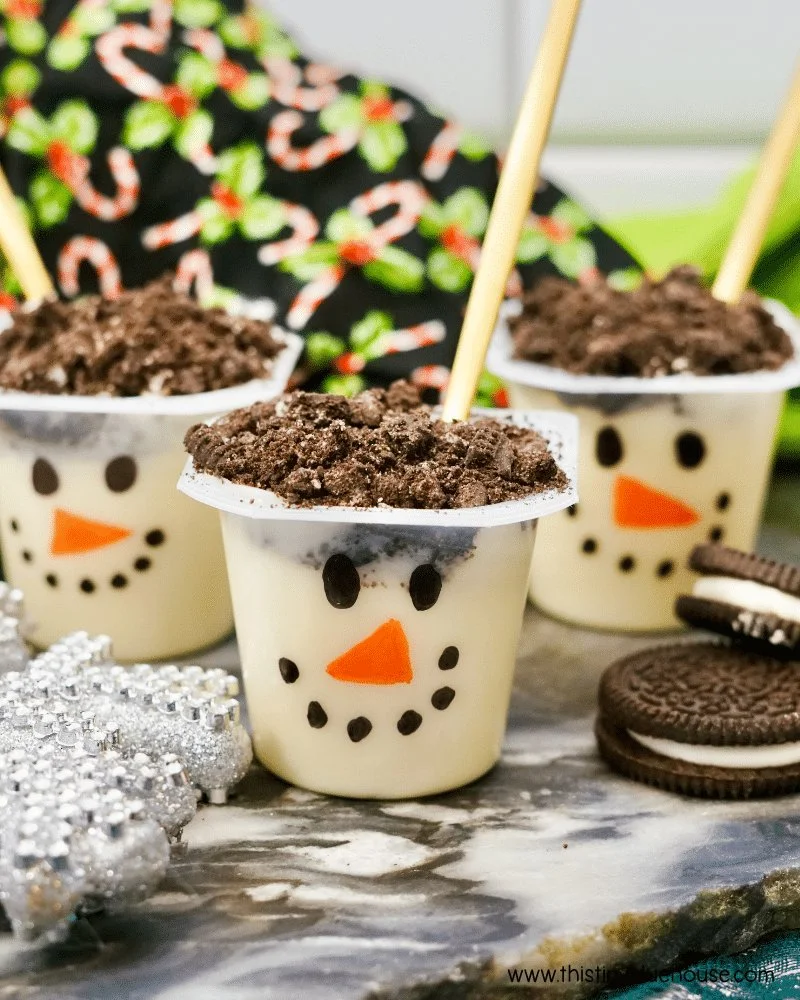
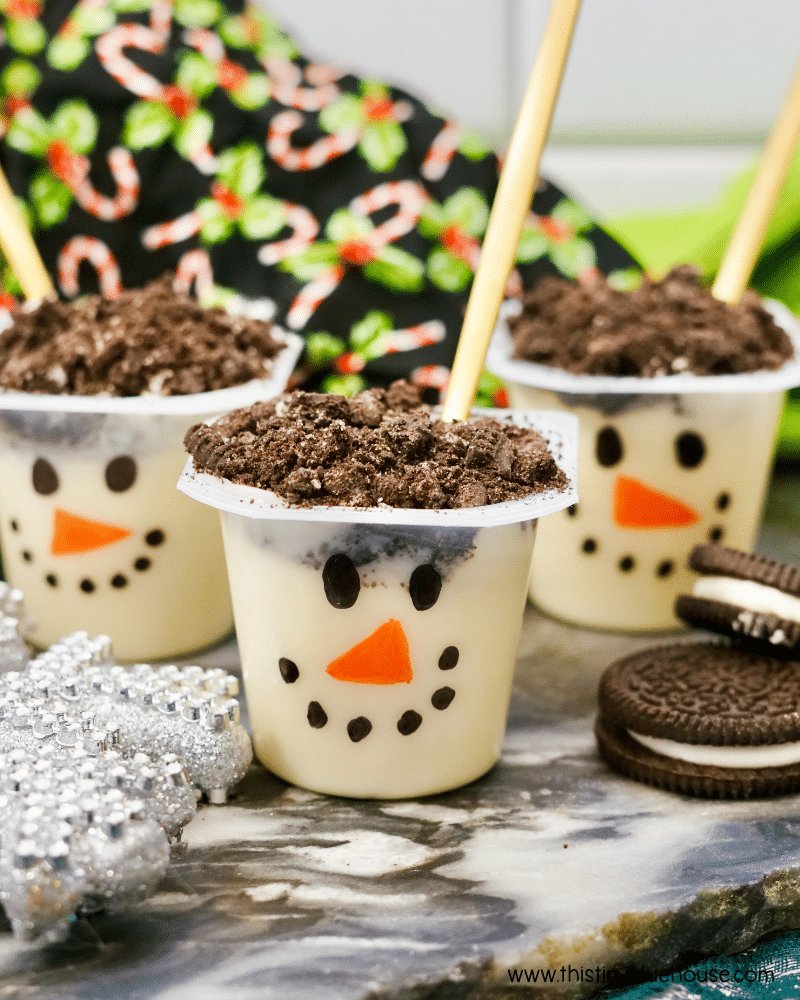
If you’re looking for an easy and festive DIY project, Snowman Pudding Cups are perfect! This fun craft combines creativity and deliciousness, making it an ideal holiday activity for families. With simple materials and beginner-friendly steps, you can quickly create adorable snowmen that are great for home decor, gifts, or seasonal parties. Whether you’re entertaining guests or sending homemade treats to friends, these Snowman Pudding Cups are sure to bring joy and smiles.
WHY YOU WILL LOVE THIS Snowman Pudding Cups
Making Snowman Pudding Cups is an enjoyable experience for several reasons:
- Easy for Beginners: This simple craft is perfect for anyone, regardless of skill level. You can easily create these pudding cups without any prior crafting experience.
- Uses Simple Materials: Most of the supplies are common items you might already have at home. They are easy to find and accessible.
- Budget-Friendly: This DIY project can be completed without breaking the bank. The materials needed are inexpensive and can be purchased at any grocery store.
- Quick to Make: With just a few steps, you can have these delightful pudding cups ready in no time.
- Great for Seasonal Decorating: These cute snowman cups are perfect for holiday decorating, adding a festive touch to your gatherings or classrooms.
- Easy to Customize: This project offers lots of room for creativity. You can easily modify it to fit your style or theme.
PROJECT DETAILS
Skill Level
This project is categorized as a beginner-friendly craft. Anyone can join in on the fun and make their own Snowman Pudding Cups.
Estimated Time
You can have these decorated pudding cups ready in about 30 minutes. This includes preparation, decorating, and cleanup.
Approximate Cost
The cost of materials is relatively low, typically ranging between $10 to $15, depending on what you already have at home.
Best For
These pudding cups are great for holiday parties, classroom activities, or as handmade gifts for friends and family during the winter season.
Project Type
This project falls under the category of seasonal crafts, specifically holiday crafts, offering a creative way to celebrate the winter months.
TOOLS AND EQUIPMENT NEEDED
Black Sharpie
This permanent marker is used for drawing the snowman’s eyes and mouth on the pudding cups.
Orange Sharpie
This marker is perfect for drawing the carrot nose, giving your snowman its character.
Food Processor (Optional)
If you want to quickly crush the Oreo cookies, a food processor can make the task easier. However, a simple rolling pin works just as well.
Zip Loc Bag
A sealable plastic bag can be used to crush Oreos without dirt or mess, making for an easy cleanup.
MATERIALS
Vanilla Pudding Cups
The base of the snowman is the vanilla pudding cup. You can use store-bought cups, or make your own if you prefer.
Oreo Cookies
These cookies are used to create the snowman’s hat. Their dark color contrasts nicely with the white pudding.
Mini Chocolate Chips
These tiny treats can serve as buttons or eyes for your snowman. They add a cute and playful touch.
Candy Canes
Candy canes can be used as decorative elements or props, enhancing the overall look of the snowman.
Pretzel Sticks
These can be used as arms for your snowman, giving it a whimsical flair.
Chocolate Chip Cookies
These can be crushed or used whole for additional toppings, offering more variety in the design.
Crumbled Candy Bars
For added texture and sweetness, crumbled candy bars can be a fun topping option.
Gingerbread Cookie Crumbs
These can add a festive flavor, suitable for holiday-themed treats.
HOW TO MAKE Snowman Pudding Cups
Step 1: Draw Faces on the Pudding Cups
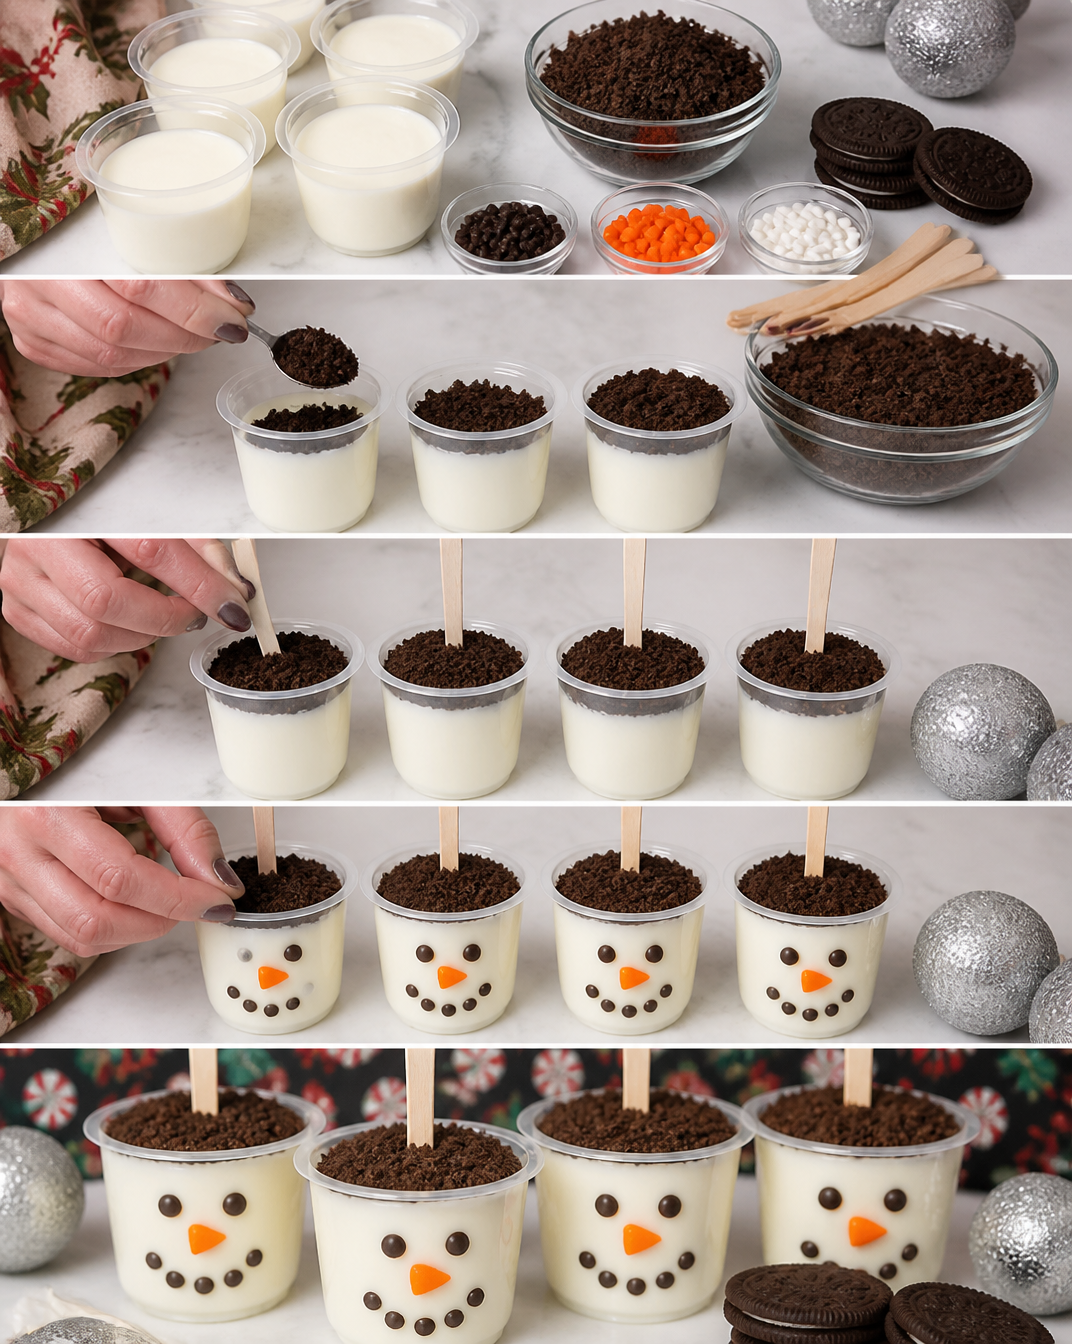
Using the black Sharpie, draw the snowman’s face on the pudding cup. Add two small circles for eyes and a dotted line for the smile. For the carrot nose, use the orange Sharpie to draw a triangle shape above the smile.
Step 2: Crush the Oreo Cookies
Take a few Oreo cookies and place them in a zip loc bag. Use a rolling pin to crush them into fine crumbs. If you have a food processor, you can pulse the cookies until they reach a crumb-like texture.
Step 3: Peel Back the Foil
Carefully peel the foil from the top of the pudding cup. Make sure to do this gently to prevent any spillage.
Step 4: Add Crushed Oreos
Spoon a generous amount of the crushed Oreos into the pudding cup to form the snowman’s hat. You can layer it for a taller hat if you’d like.
Step 5: Decorate Your Snowman
Get creative! Add mini chocolate chips as buttons, candy canes for the snowman’s scarf or as arms, and pretzel sticks for the arms. Mix and match toppings to create a unique snowman.
Step 6: Enjoy Your Pudding Cup Snowmen
Your snowmen are now ready! Enjoy them immediately, or if you’re taking them somewhere, pack them carefully in an airtight container, using Fun-Tak to hold them stable during transport.
TIPS AND TRICKS
- Choosing Materials: Opt for fresh pudding cups that have not expired for the best flavor. Ensure you have all the decoration items ready before starting to save time.
- Crushing Oreos: If you don’t have a rolling pin or food processor, you can use the bottom of a glass to crush the Oreos while they are in the bag.
- Avoiding Mess: Work on a clean surface to make cleanup easier. Covering the workspace with parchment paper can help.
- Customization: Experiment with different toppings based on personal preference or seasonal themes. Consider using coconut flakes for a "snowy" look.
- Making the Craft Last Longer: If you’re not consuming the cups right away, store them in the fridge but keep the toppings separate until serving to maintain freshness.
VARIATIONS AND CUSTOMIZATION IDEAS
- Different Colors: Use colored pudding cups to match your theme or occasion.
- Themed Versions: Create variations for different holidays. For example, use red and green toppings for Christmas.
- Personalized Versions: Allow guests to decorate their cups with their names using edible markers for a fun party activity.
- Mini Snowmen: For a fun twist, make smaller versions using mini cups for children’s parties or events.
- Gluten-Free Options: Use gluten-free cookies and toppings to accommodate dietary restrictions.
Snowman Pudding Cups FAQ
Are Snowman Pudding Cups hard to make?
No, this is a very easy DIY project that anyone can do. The steps are straightforward and perfect for beginners.
Can I use other types of cookies for decorating?
Yes! Feel free to mix things up. You can use any cookies that are easy to crush or decorate. Gingerbread cookies would add a nice holiday flavor.
How long do the Snowman Pudding Cups last?
If stored in an airtight container in the refrigerator, they can last for up to 3 days. However, it’s best to add any toppings right before serving.
Can I clean the Sharpies off the pudding cups?
The permanent markers used may be difficult to remove entirely once dried. If children participate, consider using washable markers instead for easier cleanup.
What’s the best way to transport them?
Pack them in an airtight container and use a small amount of Fun-Tak to secure the cups to the container bottom to prevent them from moving.
CONCLUSION
Creating Snowman Pudding Cups is a delightful and easy craft that captures the festive spirit of winter. This beginner-friendly project is quick to make and offers plenty of room for creativity. With budget-friendly materials that you can customize, these adorable pudding cups are sure to brighten up your holiday celebrations. Don’t hesitate to try this project yourself, and feel free to share your finished snowmen or any fun variations you create!