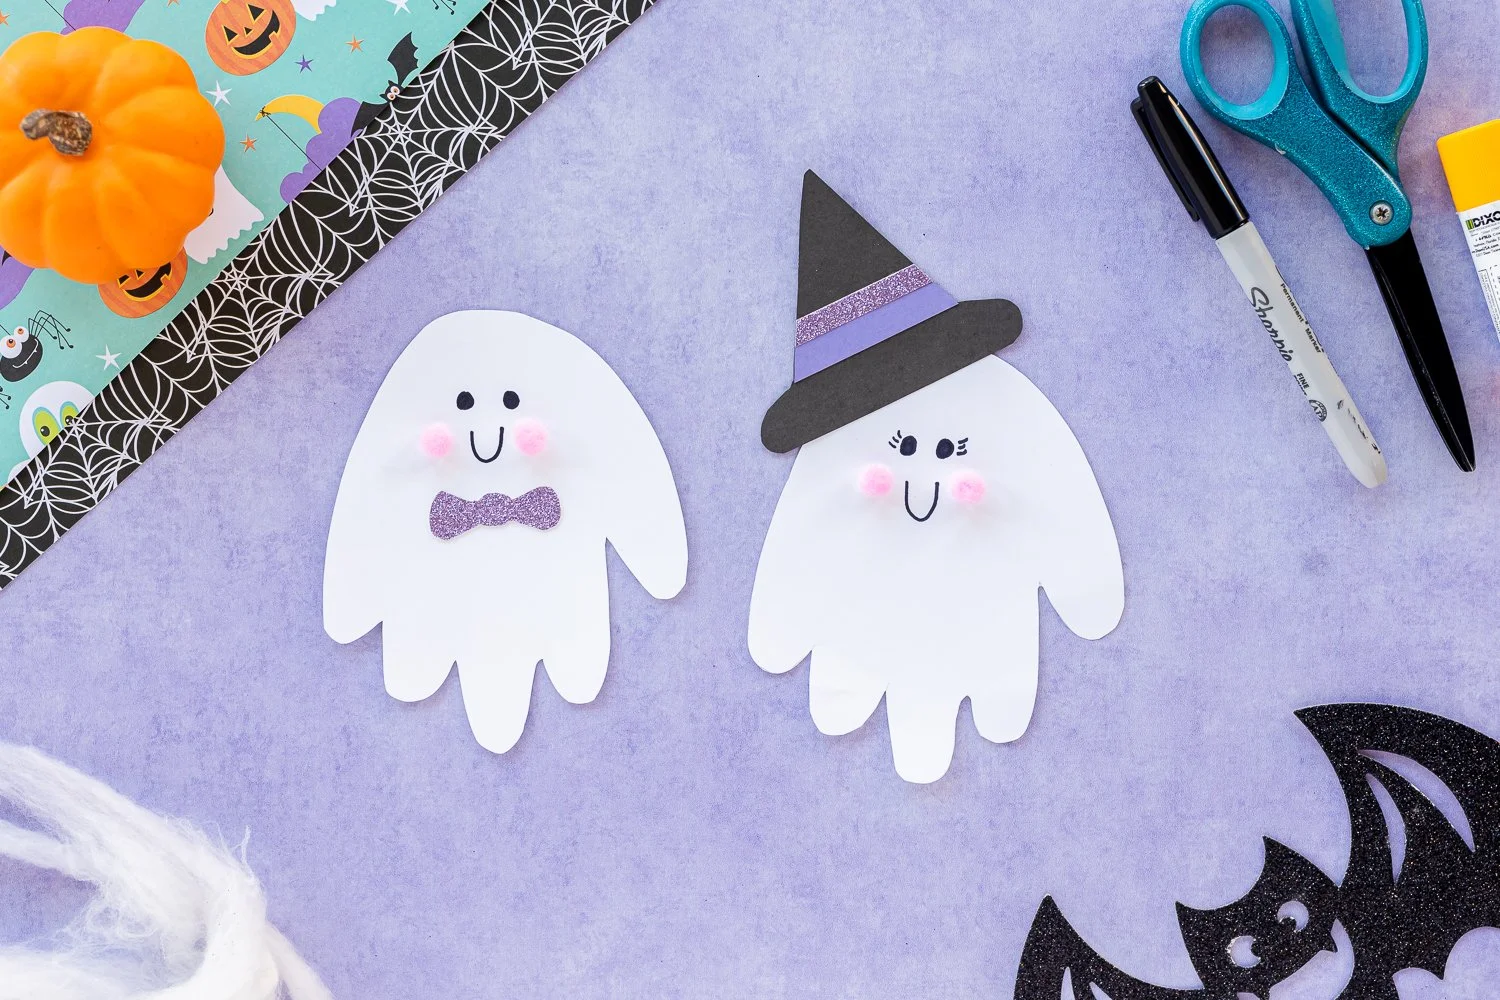
Halloween is just around the corner, and what better way to celebrate than with an easy DIY project that brings a festive touch to your home? The Halloween Handprint Ghost is a delightful craft that’s perfect for both kids and adults. This simple craft combines creativity and fun, allowing you to make adorable ghost decorations using just a few materials. Plus, it’s a great activity for families looking for budget-friendly crafts to enjoy together. Whether you’re aiming for handmade decor or a seasonal gift, these little ghosts will surely brighten your Halloween celebrations!
WHY YOU WILL LOVE THIS Halloween Handprint Ghost
Creating Halloween Handprint Ghosts is incredibly enjoyable and offers several benefits:
- Easy for Beginners: This craft is perfect for beginners of all ages. The steps are simple, making it a great way to introduce kids to DIY crafting.
- Uses Simple Materials: You can find most of the materials at home or at local craft stores, keeping your project hassle-free.
- Budget-Friendly: With minimal costs for materials, this craft won’t break the bank. Enjoy a fun day of crafting without spending a lot of money.
- Quick to Make: You can complete this project in under an hour, making it an excellent choice for last-minute decorations.
- Great for Home Decor: The finished ghosts can be used to decorate your home, adding a charming touch to your Halloween setup.
- Easy to Customize: With easy customization options, you can create unique versions of these ghosts to match your style.
PROJECT DETAILS
Skill Level
Beginner-friendly: This project requires no special skills, making it perfect for all ages.
Estimated Time
Approximately 30-45 minutes: Depending on the number of ghosts you create, this craft is quick and easy.
Approximate Cost
Low-cost: Most materials cost under $10, making it an affordable option for your DIY crafting needs.
Best For
Great for Halloween parties, home decor, or as handmade gifts. These little ghosts can make wonderful additions to your Halloween celebrations.
Project Type
Simple craft: This is a straightforward DIY project suitable for families, classrooms, or individual crafting sessions.
TOOLS AND EQUIPMENT NEEDED
Scissors
Scissors are essential for cutting out the handprint shape and the witch hat. Make sure to use child-safe scissors for younger crafters.
Glue
You will need glue for attaching different parts of the ghosts together, like the rosy cheeks and the witch hat.
Marker
A black marker or Sharpie will be used for adding facial features to the ghosts, making them come alive with personality.
MATERIALS
White Cardstock
White cardstock is the main base for the handprint ghost. It’s sturdy and perfect for creating a vibrant and fun decoration.
Black Cardstock
Black cardstock will be used to construct the witch hats. The contrast will make your ghosts pop against your Halloween decor.
Purple Glitter Cardstock
This adds a fun sparkle to the hat. The glitter will help create eye-catching details that enhance your decoration.
Black Sharpie
A black Sharpie is necessary for drawing the facial features, like eyes and a smile, which give character to your ghost.
Mini Pink Pom Poms
These will be used to create cute rosy cheeks, adding a playful touch to your ghost.
Glue
Regular craft glue or a glue stick will hold the components together, ensuring your ghost stays intact.
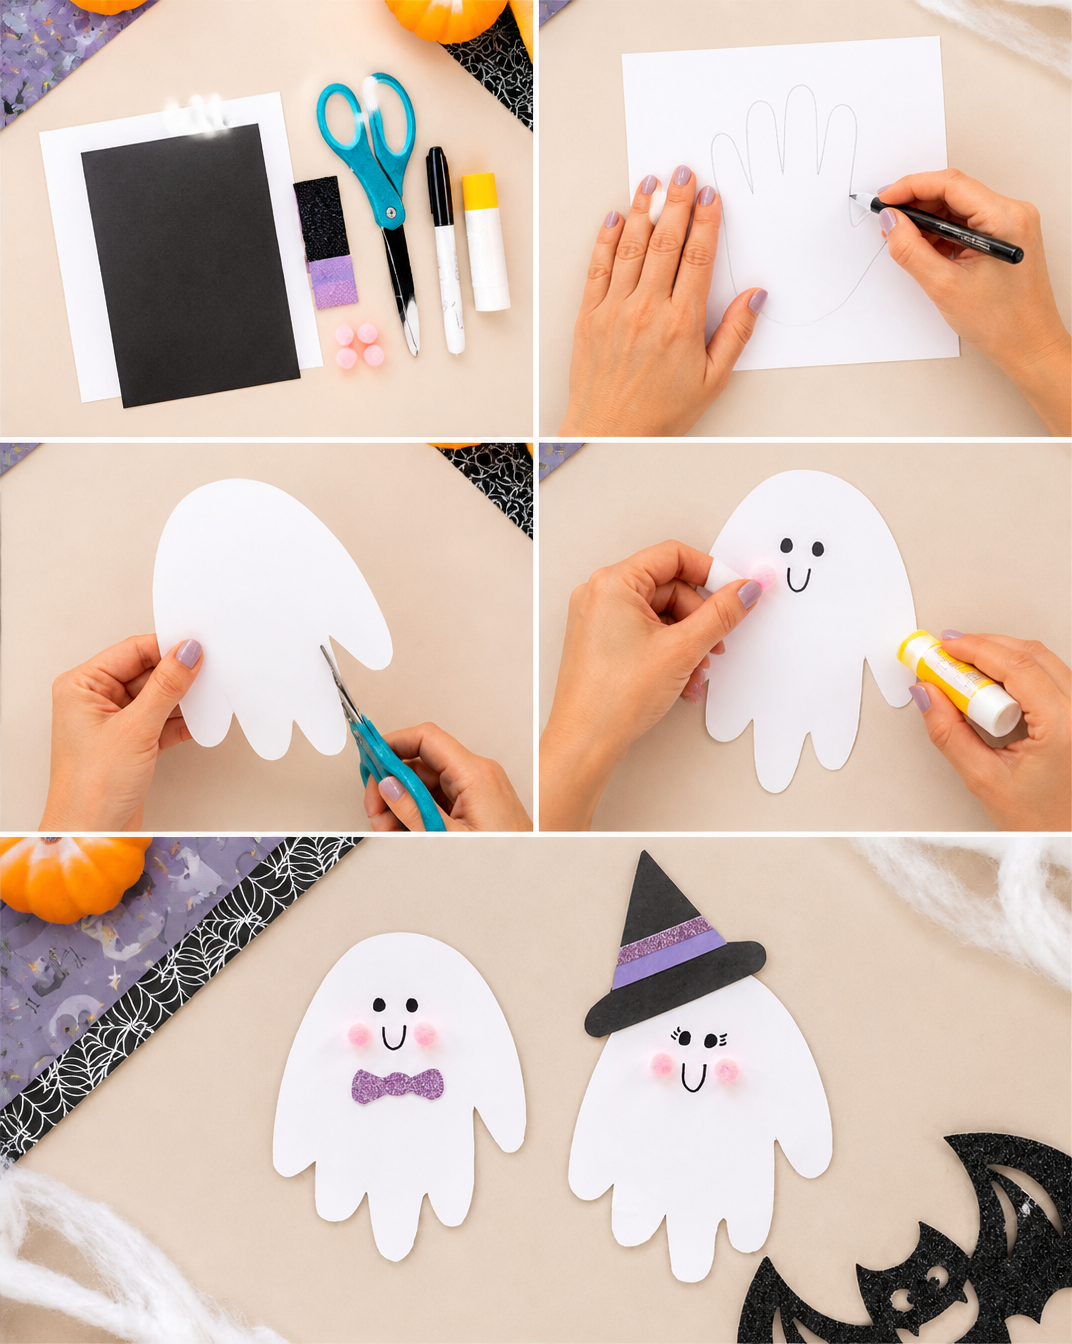
HOW TO MAKE Halloween Handprint Ghost
Let’s get started with making your adorable Halloween Handprint Ghosts. Follow these simple steps to create your decorations.
Step 1: Cut the Handprint Shape
Begin by cutting out a handprint shape from your white cardstock. You don’t need to cut between the fingers; just outline your hand to create a ghostly effect.
Step 2: Add Facial Features
Using the black Sharpie, draw two dots for the eyes and a small smile. This step adds character to your ghost and makes them more cheerful.
Step 3: Create Rosy Cheeks
Glue the mini pink pom poms onto the handprint to represent rosy cheeks. Position them under the eyes for a cute and adorable look.
Step 4: Make the Witch Hat
Using your black cardstock, cut out a simple hat shape. Next, create a purple glitter stripe for the brim of the hat. Glue the glitter cardstock around the brim for added flair.
Step 5: Assemble the Ghost
Once the witch hat is ready, glue it on top of the handprint ghost. Ensure it’s secure so that your ghost can stand proudly as part of your Halloween decor.
Step 6: Display Your Ghost
Find a fun place to display your handprint ghosts. You can hang them, place them on tables, or use them as part of a larger Halloween display.
TIPS AND TRICKS
Here are some helpful tips for making your Halloween Handprint Ghosts even more enjoyable:
- Choosing Materials: Opt for high-quality cardstock to make your ghost sturdy. This will help it last longer as a decoration.
- Cutting and Gluing: Take your time when cutting and gluing to ensure neat edges and secure attachments. A quick-drying glue can speed up the process.
- Avoiding Common Mistakes: If you’re crafting with kids, supervise them while using scissors and sharp tools. Safety first!
- Making the Project Easier: To make cutting easier for younger children, trace their hands on the cardstock beforehand and let them do the gluing and decorating.
- Creating a Neater Finish: Use scissors with patterned edges for a whimsical touch, or even add glitter to the edges for a magical finish.
- Saving Money: Use leftover cardstock from past projects or even upcycled materials like cereal boxes to reduce costs.
- Making the Craft Last Longer: If you want your ghosts to last beyond Halloween, apply a light coat of Mod Podge to seal the colors and protect them.
VARIATIONS AND CUSTOMIZATION IDEAS
Here are several ways to customize your Halloween Handprint Ghosts:
- Different Colors: Instead of traditional white, use pastel or neon colors to create unique ghost looks that suit your style.
- Different Sizes: Create various sizes of handprints by tracing adult and child hands, which can add visual interest to your decorations.
- Seasonal Versions: Turn this project into a fun winter craft by making snowman versions, adding a scarf, and using white and blue cardstocks.
- Personalized Versions: Write names or special messages on your ghosts to give them a personal touch. This adds an extra element of charm.
- Additional Decorative Elements: Use stickers or washi tape to embellish your ghosts further, allowing for endless creative possibilities.
Halloween Handprint Ghost FAQ
How difficult is making a Halloween Handprint Ghost?
It’s a beginner-friendly craft, perfect for all ages. Even first-time crafters will find it easy to follow the steps.
Can I use other materials?
Absolutely! You can explore various papers, fabrics, or even recyclable materials, making your craft more eco-friendly.
How can I store my finished ghosts?
If you want to keep your handprint ghosts for future use, store them flat in a dry, cool area, avoiding any moisture.
Will the ghosts last beyond Halloween?
Yes, if stored properly, your ghosts can last well past Halloween. To increase their durability, use a protective sealant.
How long does it take to make the ghosts?
You can complete your ghosts in about 30-45 minutes, making it a quick and fun craft for any occasion.
CONCLUSION
Making Halloween Handprint Ghosts is an easy and enjoyable activity that everyone can participate in. This budget-friendly DIY project uses simple materials, making it accessible for beginners looking to create charming decorations. Not only will these handprint ghosts add a fun touch to your home decor, but they also offer a chance for creativity and personalization. So gather your materials, invite your friends or family, and get crafting! We’d love to hear about your experiences and any unique variations you come up with, so feel free to share your finished projects and ideas!