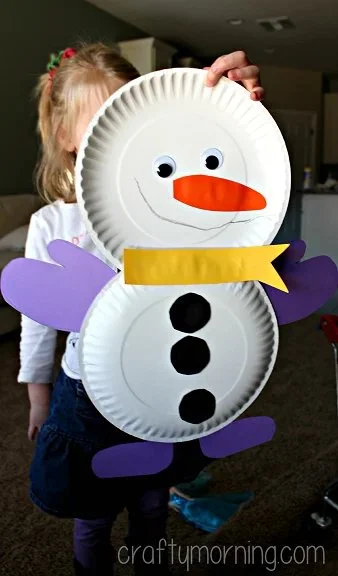
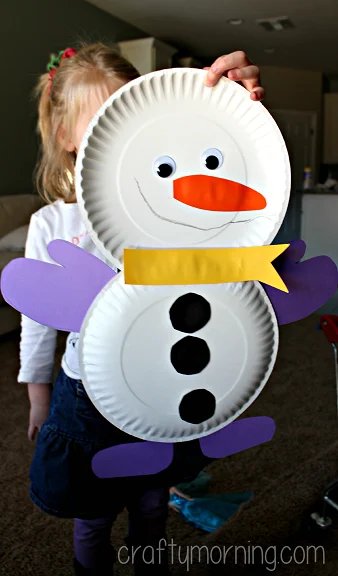
Creating fun and festive crafts can be an enjoyable activity, especially during the winter season. The Cute Paper Plate Snowman Craft for Kids is an easy DIY project that allows children to explore their creativity while making adorable decorations. This beginner-friendly craft uses simple materials, making it a budget-friendly DIY that families can enjoy together. Not only is it a perfect addition to your homemade decor, but it can also serve as a handmade gift for friends or family during the holiday season.
WHY YOU WILL LOVE THIS Cute Paper Plate Snowman Craft
This craft is a delightful and engaging activity perfect for kids and adults alike. Here are some reasons why you’ll enjoy making this cute paper plate snowman:
- Easy for beginners: The steps are straightforward, making it simple for anyone, including young children, to follow along.
- Uses simple materials: Most of the supplies are common household items, reducing the need for special shopping.
- Budget-friendly: With inexpensive materials, this craft proves that you don’t need to spend much to create something special.
- Quick to make: You can complete this project in about 30-45 minutes, allowing for a fun and productive craft session.
- Great for home decor: Display the snowman as part of your winter decorations or holiday cheer.
- Perfect for gifts: Kids can give their crafted snowmen as gifts, making them unique and personal.
- Easy to customize: There are numerous ways to personalize the snowman, ensuring that each creation is unique to its maker.
PROJECT DETAILS
Skill Level
Beginner
- This craft is suitable for young kids with parental supervision and for crafting enthusiasts of all ages due to its simple structure.
Estimated Time
30-45 minutes
- It allows for a quick and enjoyable crafting experience that won’t take all day.
Approximate Cost
$5-$10
- Most of the materials are affordable, making it a great budget-friendly craft project.
Best For
Kids aged 5-12
- It is perfect for young children but can also be fun for adults looking for a simple craft.
Project Type
Seasonal craft
- This project is ideal for winter holidays or festive seasonal decorating.
TOOLS AND EQUIPMENT NEEDED
Scissors
- Used for cutting out shapes like buttons, a nose, and other decorations from the paper.
Glue or Tape
- Essential for sticking your cut-out pieces together. Glue provides a stronger hold, while tape offers quick adhesion.
Marker or Crayon
- Useful for adding details such as facial features and decoration items.
MATERIALS
Paper Plates
- The main body of the snowman is formed by using paper plates. Two plates stacked together create a three-dimensional effect.
White Paint (optional)
- May be used to give the plates a whimsical snowy look instead of leaving them plain.
Construction Paper
- Used to cut out shapes like a nose, hat, scarf, and other accessories.
Googly Eyes
- These add a fun touch and bring the snowman to life.
String or Ribbon (optional)
- Can be used to add embellishments or hang the snowman as a decoration.
Additional Decor Items (optional)
- Glitter, sequins, or markers for customized decoration.
HOW TO MAKE Cute Paper Plate Snowman Craft
This project is simple and can be enjoyed with just a few steps!
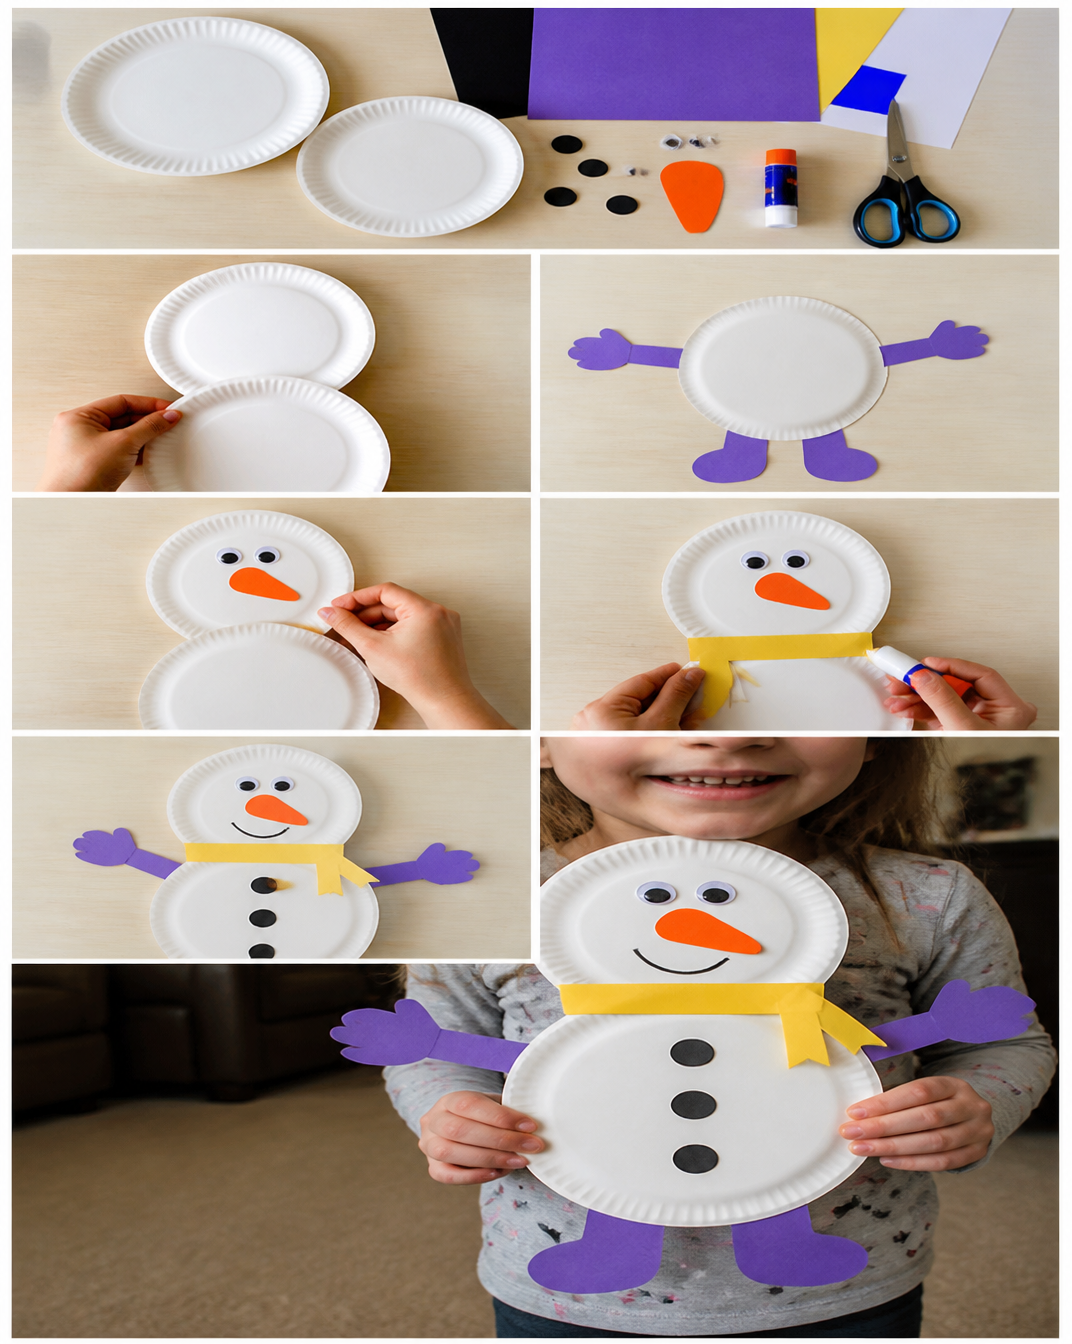
Step 1: Prepare Your Plates
- Flip one paper plate over and place it face down. This will be the bottom half of your snowman. Take the second plate and place it on top, facing up. Tape or glue the two plates together to secure them.
Step 2: Cut Out the Accessories
- From your construction paper, cut out pieces to form the snowman’s facial features, buttons, mittens, scarf, and boots. A classic carrot shape works well for the nose, and you can use colorful paper for the scarf and mittens.
Step 3: Assemble the Snowman
- Begin by gluing or taping the googly eyes onto the top plate to make your snowman’s eyes. Attach the cut-out nose just below the eyes, forming a friendly face. Next, adhere the buttons down the center of the snowman’s body.
Step 4: Add the Finishing Touches
- Attach the mittens, scarf, and boots securely to their respective places. You can get creative with colors and designs to make the snowman unique and fun!
Step 5: Create a Smile
- Once all the decorations are firmly in place, use your marker or crayon to draw a happy smile on your snowman’s face. This final touch will give your craft its personality!
TIPS AND TRICKS
Here are some helpful tips to ensure your crafting experience is enjoyable:
- Choose durable materials: If you have paint, using it to cover the plates can make your snowman look more festive and professional.
- Cut Carefully: When using scissors, ensure that children have adult supervision and use blunt-end scissors for safety.
- Experiment with textures: Try adding fabric scraps, yarn, or even stickers for more textured snowman decorations.
- Avoid common mistakes: Make sure the pieces are securely attached and that the snowman is stable, especially if kids will be moving it around.
- Make the project easier: If time is limited, prepare and cut the accessory pieces beforehand for children to assemble.
- Save money: Look at your recycling bin for materials. You can use leftover wrapping paper or other household items.
- Enhance durability: If you want your snowman to last longer, consider sealing it with decoupage glue.
- Work safely: Keep all crafting materials organized and supervise children, especially with sharp tools like scissors.
VARIATIONS AND CUSTOMIZATION IDEAS
Encourage creativity by suggesting variations on the snowman craft:
- Different colors: Instead of the traditional white snowman, use colored plates or paint them in fun shades.
- Theme-based snowmen: Create a snowman based on holidays, like red and green for Christmas or pastel colors for spring.
- Size changes: Use larger or smaller plates to craft a bigger or mini snowman.
- Accessorize differently: Experiment with different materials like felt for the scarf or googly-eyed balloons for whimsical characters.
- Seasonal versions: Switch elements for other holidays, like a spooky Halloween ghost or a character from a winter story.
- Patterned paper: Use brightly colored or patterned scrapbook paper for cut-outs to add personality to the snowman.
- Personalized versions: Have kids write their names or messages on the snowman, making it a keepsake.
Cute Paper Plate Snowman Craft FAQ
How difficult is this craft?
- This snowman craft is very beginner-friendly and suitable for kids or anyone looking for a simple DIY project.
What materials do I need?
- For this craft, you will need paper plates, construction paper, scissors, glue or tape, googly eyes, and optional decorative materials.
How long does this craft take?
- The whole project generally takes about 30-45 minutes, depending on individual pace and decoration complexity.
Can I store the finished snowman?
- You can store your snowman in a cool, dry place. To keep it longer, consider placing it in a protective box.
How can I keep the snowman clean?
- If your craft uses paint or glitter, it’s best to keep it away from areas where it may get dirty. For general cleaning, a dry cloth can gently remove dust.
CONCLUSION
The Cute Paper Plate Snowman Craft is a wonderfully easy DIY project that is perfect for kids and beginners looking to get creative this winter. Its simple materials and quick steps make it a delightful activity that can brighten up your home decor or serve as a unique homemade gift. Whether you follow the steps as is or customize your snowman, this craft is sure to be a memorable experience. Gather your materials, tap into your creativity, and enjoy making this cheerful snowman! Be sure to share your finished project or customize ideas with us!