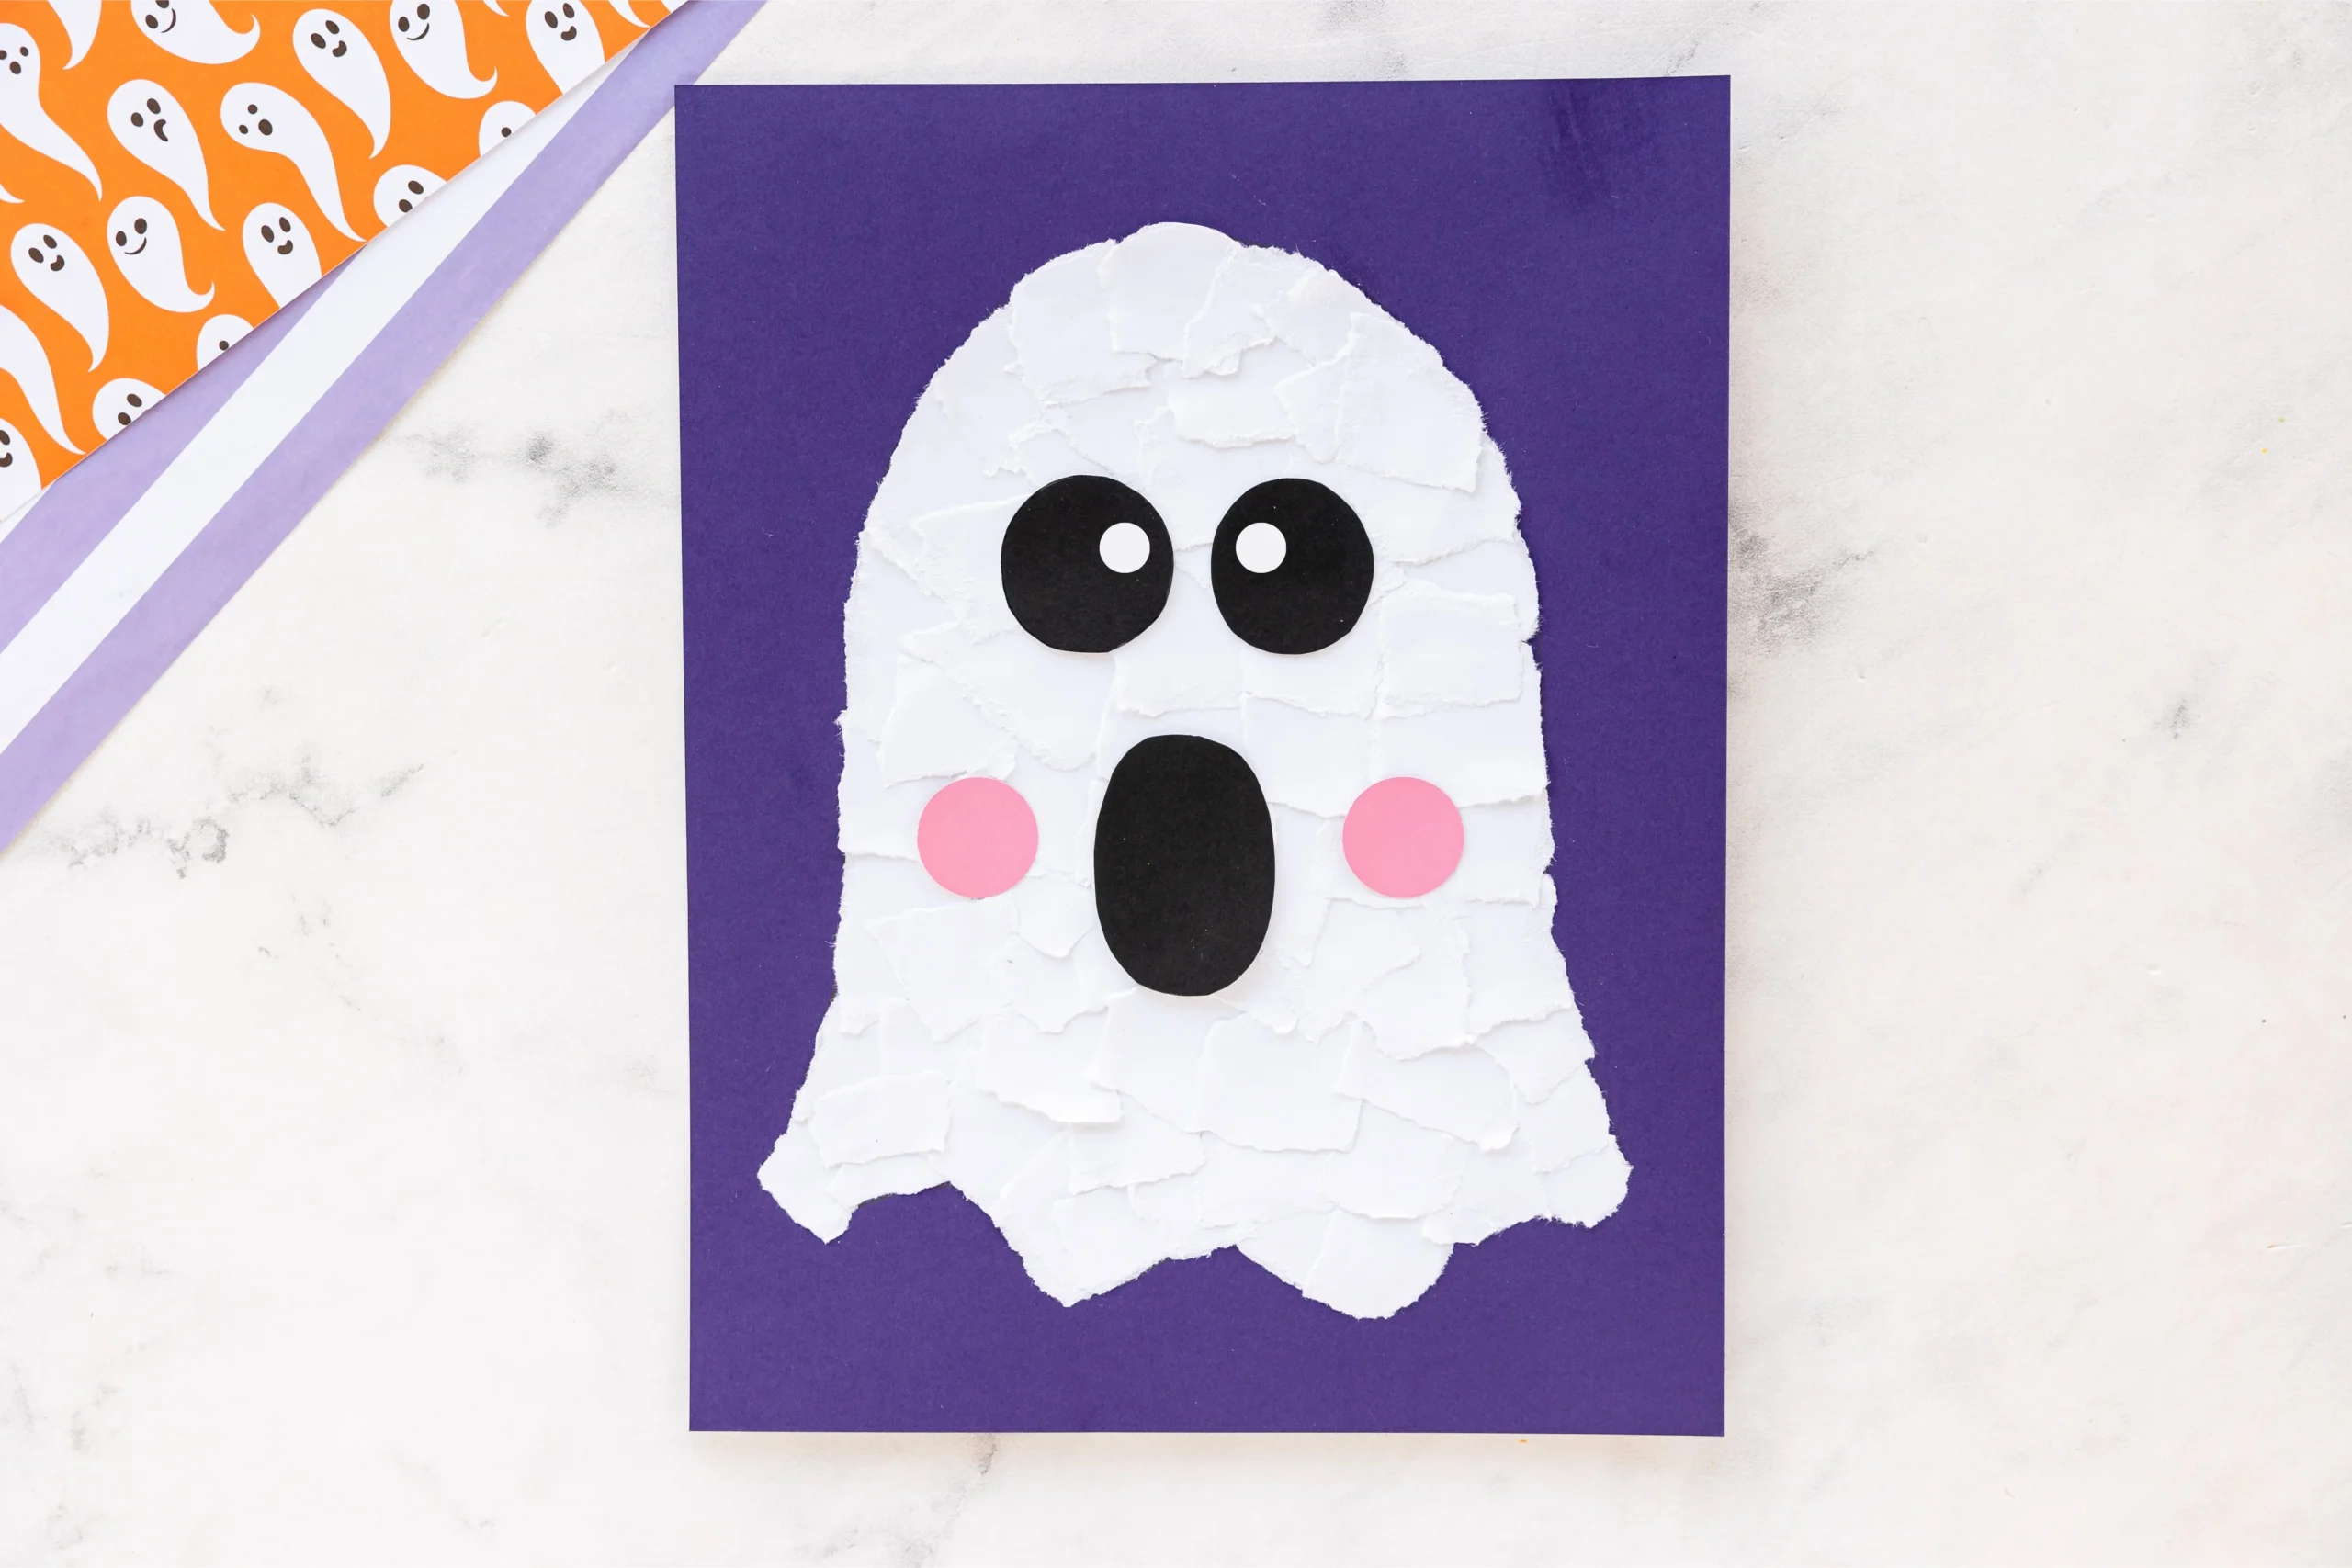
Are you looking for an easy craft project to do with your kids? The Easy Torn Paper Ghost Craft for Kids is a perfect choice! This simple DIY project is not only fun, but it also encourages creativity while requiring minimal materials. You’ll enjoy making these adorable paper ghosts that can serve as delightful decorations for your home during Halloween or any spooky season.
WHY YOU WILL LOVE THIS Easy Torn Paper Ghost Craft
This Easy Torn Paper Ghost Craft is fantastic for several reasons:
- Easy for Beginners: With straightforward steps, even young children can join in the fun, making this a perfect beginner-friendly craft.
- Uses Simple Materials: This craft involves common materials you likely already have at home.
- Budget-Friendly: Creating these ghosts won’t break the bank, as most supplies are inexpensive.
- Quick to Make: You can easily finish this craft within a short time frame, making it a wonderful afternoon activity.
- Great for Home Decor: Once finished, these ghosts become charming additions to your seasonal home decor.
- Easy to Customize: You can personalize these ghosts in various ways, making them unique to your home.
PROJECT DETAILS
Skill Level
Beginner-friendly. This project is approachable for kids and adults alike.
Estimated Time
Approximately 30 minutes to 1 hour, depending on the pace of the participants.
Approximate Cost
Very low; most materials can be found around the house or are inexpensive to purchase.
Best For
Families and kids looking for a fun craft activity, particularly during Halloween.
Project Type
Seasonal crafts or DIY decorations for home.
TOOLS AND EQUIPMENT NEEDED
Scissors
Used to tear or cut the paper into ghost shapes.
Glue Stick or Liquid Glue
Necessary for adhering the torn paper to the base or for attaching any additional decorations.
Marker or Crayon
Used for drawing eyes and a mouth on the ghosts to bring them to life.
MATERIALS
White Paper
This will be the base material for the ghosts. You can use any kind of paper, like printer paper or construction paper.
Black Paper (Optional)
Used if you want to create spooky hats or other features for your ghosts.
String or Yarn (Optional)
Useful if you want to hang the ghosts for decoration.
Tape (Optional)
To help securely attach parts of the ghost or hang it if not using string.
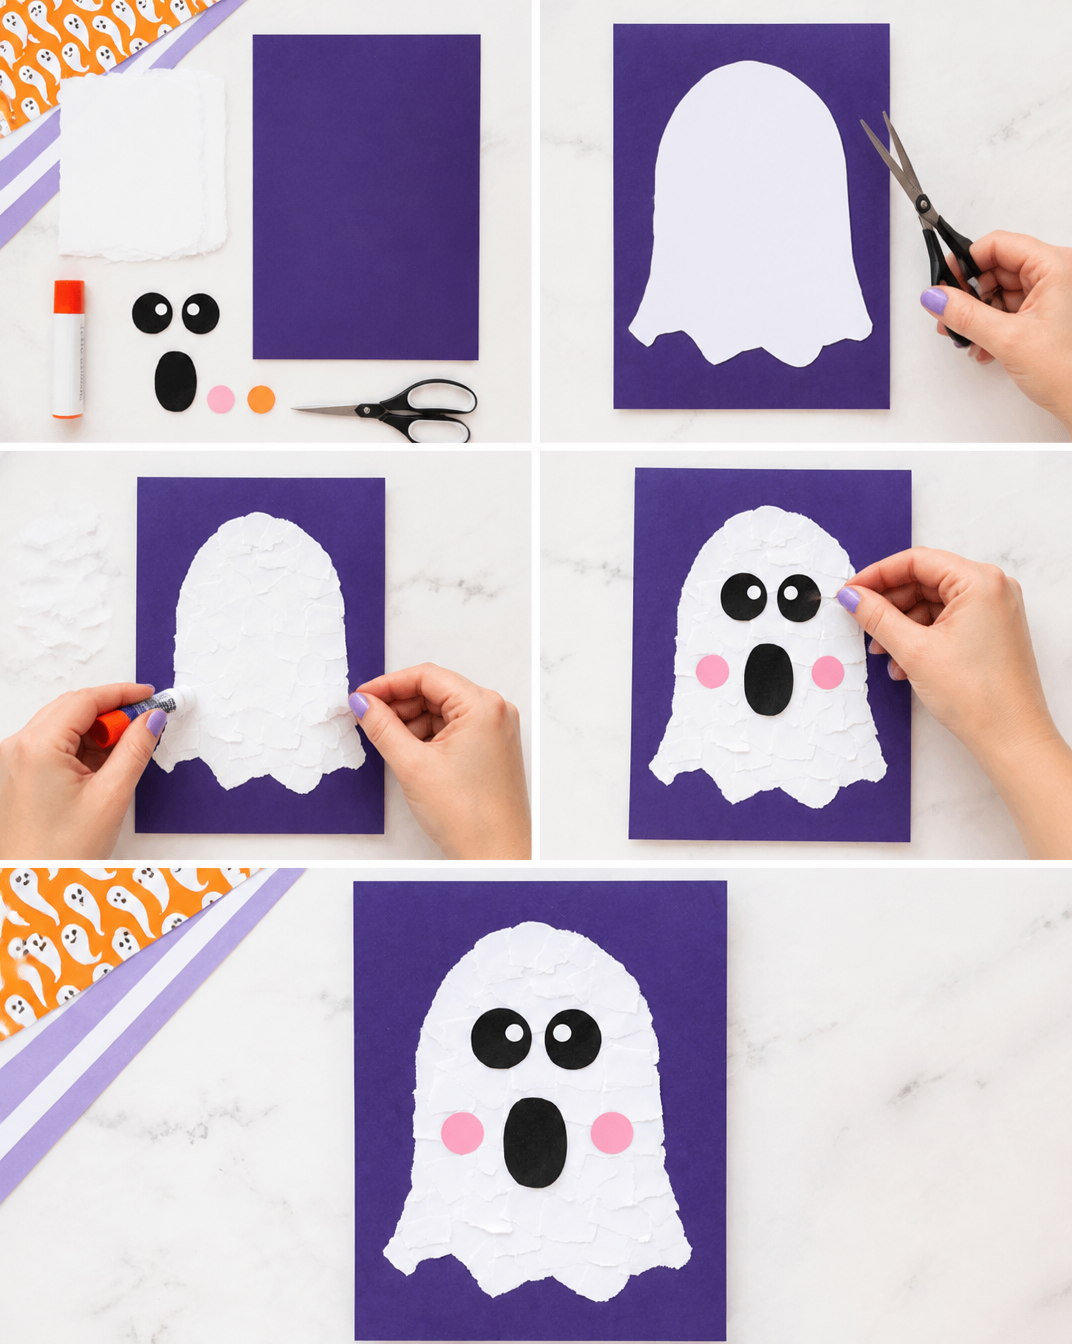
HOW TO MAKE Easy Torn Paper Ghost Craft
Step 1: Gather Your Materials
Start by collecting all the necessary materials. Lay everything out on a clean, flat surface to work efficiently.
Step 2: Tear the Paper
Take your white paper and begin tearing it into various shapes. You can make uneven, jagged edges to give your ghosts a spooky look. Encourage your kids to be creative with the size and shape!
Step 3: Create the Ghost Shape
Once you have enough torn paper pieces, start arranging them to form ghost shapes. You can either layer the torn pieces to create a fuller ghost or just keep it simple with one layer.
Step 4: Attach the Paper
Using glue, attach the torn pieces to your base paper. Spread glue generously to ensure the edges stick well. If you’re using multiple layers, allow the glue to dry slightly before adding more pieces.
Step 5: Draw the Face
Once the glue has dried, grab your marker or crayon and draw a spooky face on your ghost. Simple dots for eyes and a wiggly line for a mouth can make the ghost look fun and playful.
Step 6: Add Details (Optional)
If you’re feeling extra creative, you can cut out hats from black paper and glue them on your ghosts. You can also use string or yarn to make your ghosts float by hanging them.
Step 7: Display Your Ghosts
Once everything is dry, find a spot in your home to display your spooky creations! Whether on a window, hanging from the ceiling, or on a table, these ghosts will add a festive touch to your décor.
TIPS AND TRICKS
- Choosing Materials: Use paper with different textures or patterns to create unique ghost effects.
- Cutting and Tearing: If you’re working with younger children, help them tear paper to avoid injury with scissors.
- Avoiding Common Mistakes: Too much glue can make the paper soggy; use just enough to keep it secure.
- Customization: Incorporate various ghost accessories like bows or hats made from colorful paper to add character.
- Making the Craft Last Longer: Use a heavier paper like cardstock for more durability, especially if children want to play with their ghosts.
- Working Safely: Always supervise children when using scissors or glue to ensure safety throughout the craft process.
VARIATIONS AND CUSTOMIZATION IDEAS
- Different Colors: Use different shades of paper to create unique or themed ghosts, such as pastel colors for a light-hearted look.
- Size Variations: Make larger or smaller ghosts depending on your preference for display.
- Layering Techniques: Try a more intricate design by layering different colors and textures of paper.
- Seasonal Versions: Incorporate traditional Halloween colors like orange and purple for a festive touch, or create winter-themed ghosts with white and blue paper.
- Personalized Versions: Let each child design their ghost with their unique expressions or even their names.
Easy Torn Paper Ghost Craft FAQ
Is this craft difficult for kids?
No, this craft is straightforward and beginner-friendly, perfect for kids with adult supervision.
What materials do I need to make the ghosts?
You will need white paper, glue, and markers. Optional materials include black paper, string, and tape.
How should I store the ghosts once they are made?
Store the finished ghosts in a dry area. If they are flat, you can keep them in a folder to prevent damage.
Can I use other types of paper?
Yes, you can use any type of paper, like construction paper, printer paper, or even recycled paper.
How long does it take to complete this craft?
Typically, it should take about 30 minutes to an hour, depending on how detailed you want to make the ghosts.
CONCLUSION
The Easy Torn Paper Ghost Craft is an enjoyable, beginner-friendly DIY project perfect for family bonding during the spooky season. This craft uses simple materials that are usually inexpensive and readily available, making it a budget-friendly activity. Whether for home decor, a fun Halloween display, or just a creative way to pass the time, this craft offers something for everyone.
We encourage you to gather your materials and try making these charming paper ghosts. Share your finished projects or any fun variations you come up with; we’d love to hear about your crafting experience!