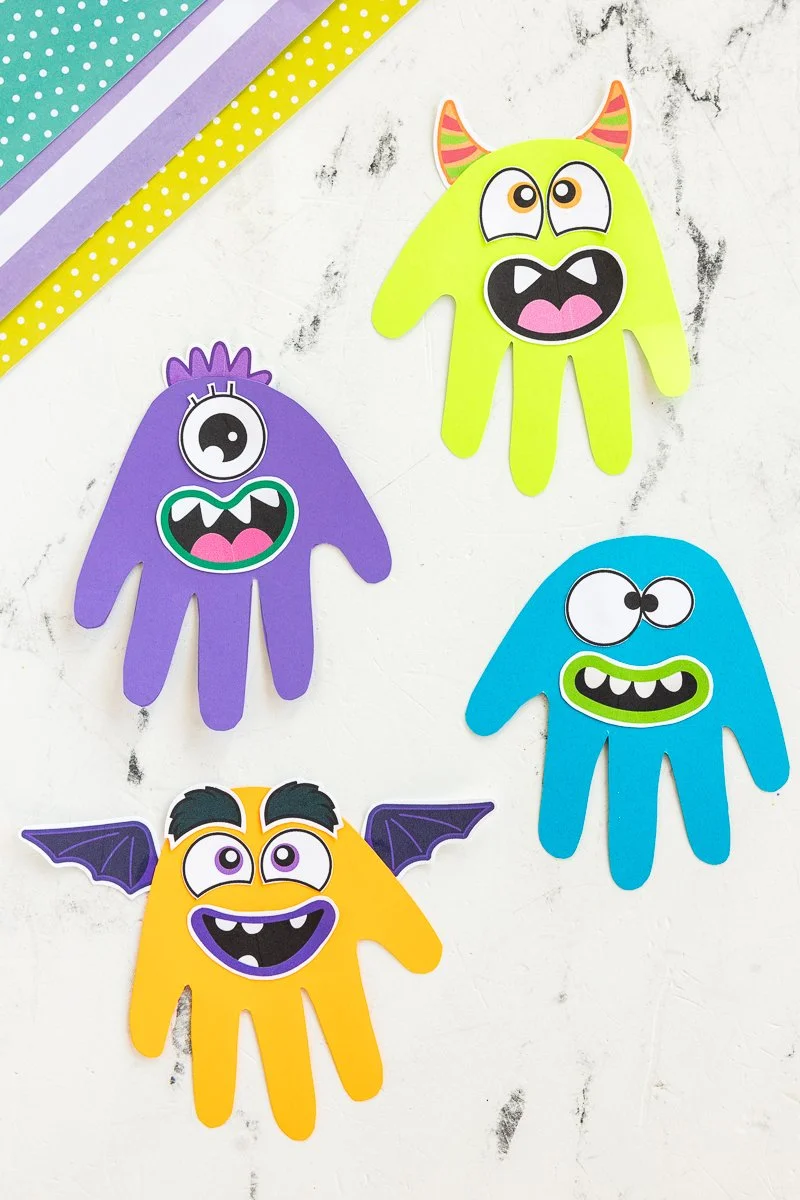
Handprint monsters are a delightful DIY craft project that even a beginner can master! This creative DIY activity only requires basic materials and tools, making it a fantastic option for families and individuals alike. With just a few supplies and a little imagination, you can create your very own whimsical monsters. Whether you want to use them as quirky home décor, personalized gifts, or even seasonal decorations, handprint monsters are an easy craft that allows for plenty of customization. This project is not just fun; it’s also budget-friendly and perfect for developing crafting skills.
WHY YOU WILL LOVE THIS Handprint Monsters
Making handprint monsters is a fun and engaging activity that anyone can enjoy. Here are several reasons why this craft will appeal to you:
- Easy for Beginners: The simplicity of tracing your hand and applying cutouts makes this project approachable for crafters of all skill levels.
- Uses Simple Materials: You likely have many of the materials at home already, contributing to a low-cost DIY project.
- Budget-Friendly: The expenses for this project are minimal, as it mainly relies on household items.
- Quick to Make: Depending on your pace, you can complete this craft in under an hour, making it a great option for a quick creative break.
- Great for Home Decor: Handprint monsters can be hung on walls or displayed on shelves, adding a playful touch to your home.
- Perfect for Gifts: Personalize these crafts to give as thoughtful and creative handmade gifts.
- Seasonal Decorating: These monsters can fit holiday themes or seasonal changes, adding a crafty touch throughout the year.
- Easy to Customize: You can make them in different colors, sizes, and features to fit your personal style.
PROJECT DETAILS
Skill Level
This project is excellent for beginners. No special skills are required; just follow the step-by-step instructions!
Estimated Time
You can expect to spend about 30-45 minutes on this project from start to finish.
Approximate Cost
The project cost is very low, usually under $10 depending on what materials you already have at home.
Best For
Handprint monsters are ideal for families, classrooms, or any crafting session where creativity is encouraged.
Project Type
This is a fun DIY project that’s both decorative and functional, perfect for seasonal crafts, holiday crafts, or simply as a playful home décor element.
TOOLS AND EQUIPMENT NEEDED
Scissors
You will need a pair of scissors to cut out your handprint and the monster features from cardstock. Make sure to use child-safe scissors if kids are involved!
Glue Stick or Craft Glue
This is used to attach the various features onto your handprint monster. A glue stick is less messy and easy for kids to use.
Pencil
You will need a pencil to trace your hand onto the cardstock. A regular pencil works perfectly for this simple task.
MATERIALS
Colored Cardstock
Bright-colored cardstock in colors like purple, green, blue, and orange serves as the base for your handprint monster. This adds a vibrant look and feel to your creations.
Printable Monster Features Template
This template includes various monster features like eyes, mouths, and horns that you can cut out to decorate your monster. You can easily find many templates online with a quick search.
Glue Stick or Craft Glue
You’ll need glue to attach the features to your handprint monster. A glue stick is recommended for easier handling, especially for younger crafters.
Scissors
Use scissors to cut out your handprint and the monster features. If children are crafting, remember to provide safety scissors.
Pencil
A pencil will help you trace your hand, ensuring that your monster has the right shape and size.
HOW TO MAKE Handprint Monsters
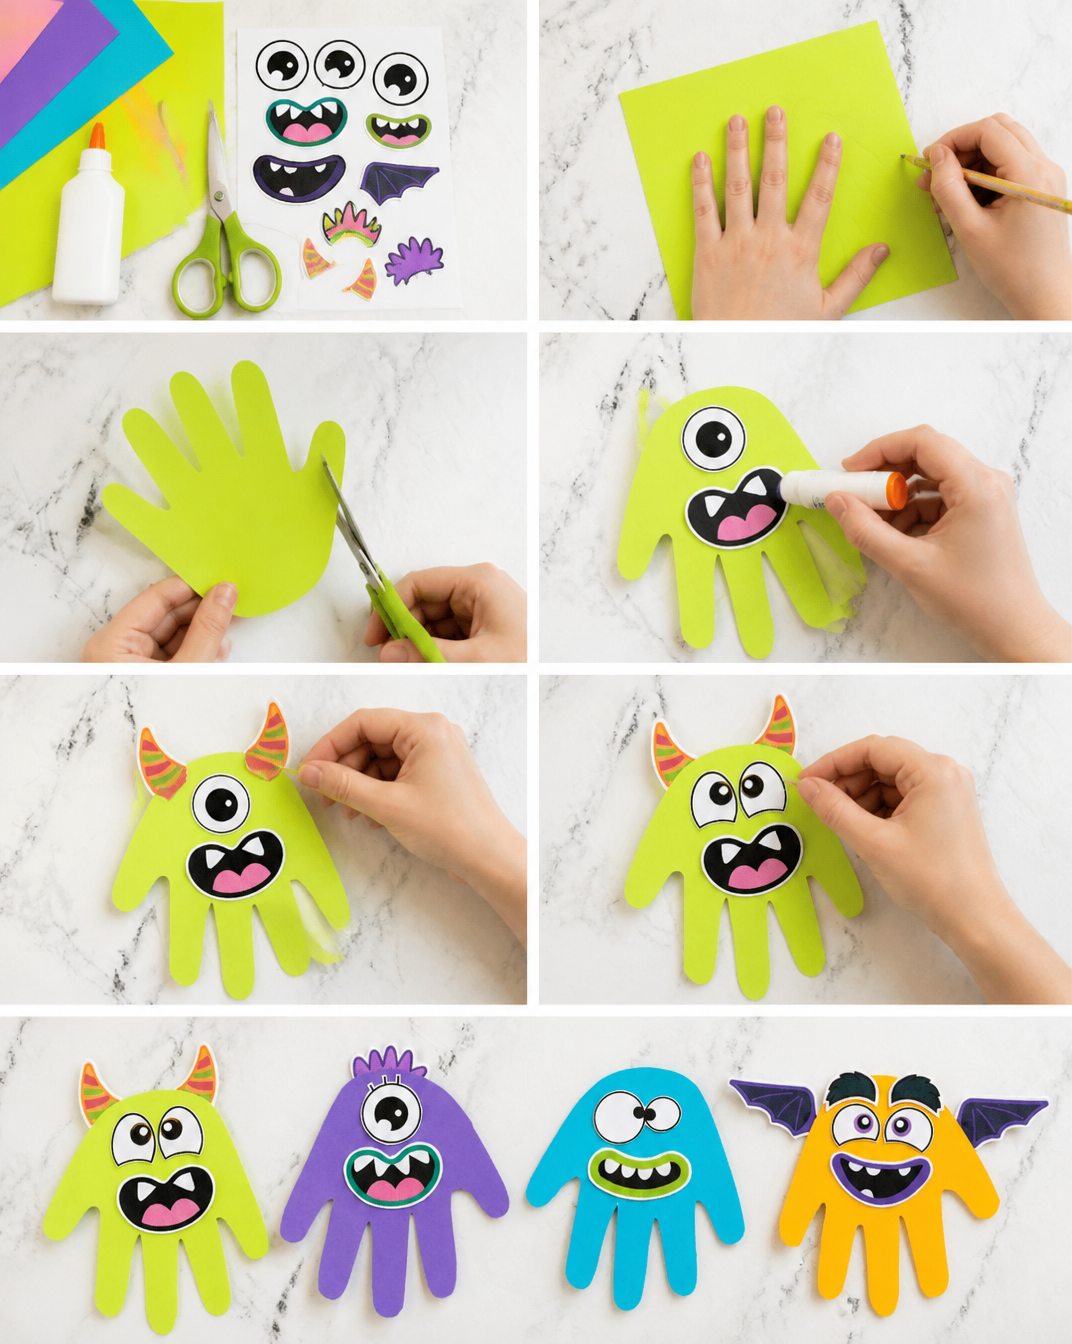
Step 1: Trace Your Hand
Start by placing one hand flat on a piece of colored cardstock. Use a pencil to trace around your hand carefully. This will serve as the body of your monster.
Step 2: Cut Out Your Handprint
Take scissors and cut out the traced handprint. This is now the monster’s base! Ensure you cut carefully along the lines.
Step 3: Prepare Monster Features
Print the monster features template. Choose the features you want for your monster, such as eyes, mouths, and horns. Cut these out carefully with scissors.
Step 4: Attach Features to Your Handprint
Decide where to place the cut-out features on the handprint monster. Use your glue stick to attach them securely.
Step 5: Add Extra Decorations
Get creative! Add stickers, glitter, or any other decorations you like to make your monster even more unique. The more colorful and creative, the better!
Step 6: Allow to Dry
Let your handprint monster dry completely before displaying or using it. This ensures everything sticks well and is ready for showing off!
TIPS AND TRICKS
- Choosing Materials: Select bright, contrasting colors for your cardstock and features. This maximizes visual appeal.
- Cutting Tips: Take your time cutting out the handprint and monster features. Precise cuts make for a more polished final product.
- Gluing Properly: Use enough glue to ensure the features stick but avoid using too much to prevent messes.
- Avoiding Mistakes: Double-check how your monster looks before gluing features down. It’s easier to rearrange them before they are attached.
- Get Creative: Don’t shy away from adding extra features, like bows, additional eyes, or other fun elements to make your monster truly unique.
- Storing: Keep your finished monsters flat in a box or folder to prevent them from bending or tearing.
- Safety: If children are making these crafts, supervise scissor use to ensure safety throughout the project.
VARIATIONS AND CUSTOMIZATION IDEAS
- Different Colors: Use different shades of cardstock to create an entire family of monsters with various personalities.
- Different Sizes: Experiment with tracing the hands of adults or children to make larger or smaller monsters.
- Seasonal Themes: Create holiday-specific monsters, such as spooky ghosts for Halloween or friendly monsters for birthdays.
- Emoji Faces: Instead of traditional features, create fun emoji-style faces for a modern twist.
- Texture Options: Use materials like felt, fabric, or even upcycled cardboard features for a three-dimensional effect.
- Handwritten Messages: Write a fun phrase or a personalized note on the back or front of your monster for gift-giving.
- Make It a Game: Create a series of monsters with different characters and have storytelling sessions with your creations!
Handprint Monsters FAQ
How difficult is this DIY project?
This is a beginner-friendly craft that requires no special skills. Anyone can make handprint monsters with basic materials!
What materials do I need for this craft?
You will need colored cardstock, printable features template, glue, scissors, and a pencil. Most of these materials are common household items.
Can I store my handprint monsters for later use?
Yes! Keep them flat in a box or a folder, away from moisture or heavy objects, to prevent bends or tears.
How long does it take to finish this craft?
Most people complete this craft in 30-45 minutes, making it a great option for a quick and fun activity.
Can I personalize these monsters?
Absolutely! Personalization is part of the fun. Use various colors, decorations, and even add names or phrases to make each monster unique.
CONCLUSION
Making handprint monsters is an easy DIY project that is perfect for anyone looking to dive into crafts. This simple craft is fun, budget-friendly, and leaves room for plenty of customization. Whether you use them for home décor or give them as handmade gifts, handprint monsters can bring joy to any room. They are great for seasonal decorating or simply as a fun project to do with friends and family. We encourage you to try your hand at this craft, and we’d love to hear about your experience! Share your finished projects and creative ideas with us. Happy crafting!