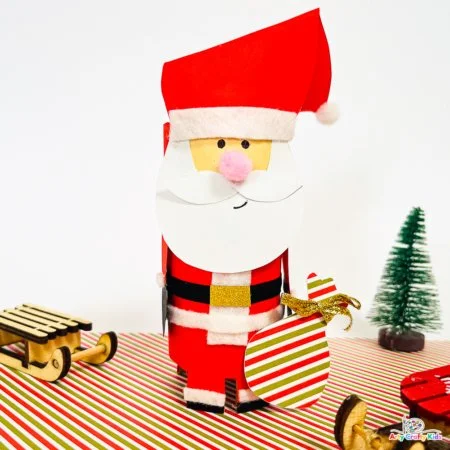
Making a Paper Roll Santa Claus is an easy craft that’s perfect for the holiday season. This DIY project uses simple materials you probably have at home, making it a budget-friendly option for holiday decor. Not only is this craft approachable for beginners, but it also allows for personal touches, making it a fantastic way to get in the festive spirit. In this article, we’ll guide you through this fun and creative project step by step, highlighting tips and variations along the way.
WHY YOU WILL LOVE THIS Paper Roll Santa Claus
Creating your own Paper Roll Santa Claus is a delightful activity for several reasons:
- Easy for Beginners: This festive project is simple enough for anyone to pick up, whether you’re new to crafting or an experienced DIYer.
- Uses Simple Materials: The materials are easily accessible, which makes for a hassle-free crafting experience.
- Budget-Friendly: Most of the supplies can be found around your home or in your craft stash, keeping costs low.
- Quick to Make: You’ll be able to whip up this jolly Santa in under an hour, ideal for busy holiday schedules.
- Great for Home Decor: Your finished Santa makes a charming addition to your holiday decorations, bringing a touch of warmth and cheer to your space.
- Fun for Gifts: This handmade craft can be a unique gift for friends and family, spreading the holiday spirit and showing off your creativity.
- Easy to Customize: You can vary colors, sizes, or features to create a distinctive Santa that reflects your style.
PROJECT DETAILS
Skill Level
Beginner-friendly, perfect for all ages and skill sets. This craft is approachable for kids and enjoyable for adults too.
Estimated Time
Approximately 30-60 minutes, depending on your crafting speed.
Approximate Cost
The total cost is low, usually between $5-15, as you may already have many materials at home.
Best For
This project is perfect for holiday crafting, family activities, or as a fun decoration for parties and gatherings.
Project Type
A seasonal craft that makes for lovely homemade decor or a thoughtful handmade gift.
TOOLS AND EQUIPMENT NEEDED
Scissors
These are essential for cutting the paper and creating Santa’s various features. Ensure your scissors are sharp for clean cuts.
Glue Stick
A glue stick is perfect for attaching all the elements together. It dries clear, so it won’t affect the look of your craft.
Black Marker Pen
Use this for adding Santa’s facial features, such as eyes and a smile, giving him character and charm.
Santa Claus Template
This template provides all the necessary shapes for Santa’s face, hat, and other details. You can find templates online or create your own easily.
MATERIALS
Red Paper
This will serve as Santa’s coat and hat, giving him that classic festive look.
White Paper
White paper is for the beard, moustache, and trim on Santa’s hat and coat.
Skin Colored Paper
Use this for Santa’s face, giving him a lifelike appearance.
Black Paper
This will be used for Santa’s boots and belt, adding to the overall character of the Craft.
Patterned Paper
Consider using patterned paper for Santa’s gift sack, adding some visual interest to the project.
White Felt
White felt adds texture and warmth, perfect for a fluffy beard or hat trim.
Black Felt
This is ideal for creating a textured belt for Santa, giving him a more dimensional look.
Yellow Felt
This can be used to create a decorative belt buckle for Santa, completing the look.
Pink Pom Pom
A small, pink pom pom can serve as the nose for Santa, adding a cute touch.
Red Pom Pom
A red pom pom can be added to the top of the hat for a whimsical detail.
String
This is used to create a handle for Santa’s gift sack, ensuring it can be held in his hands.
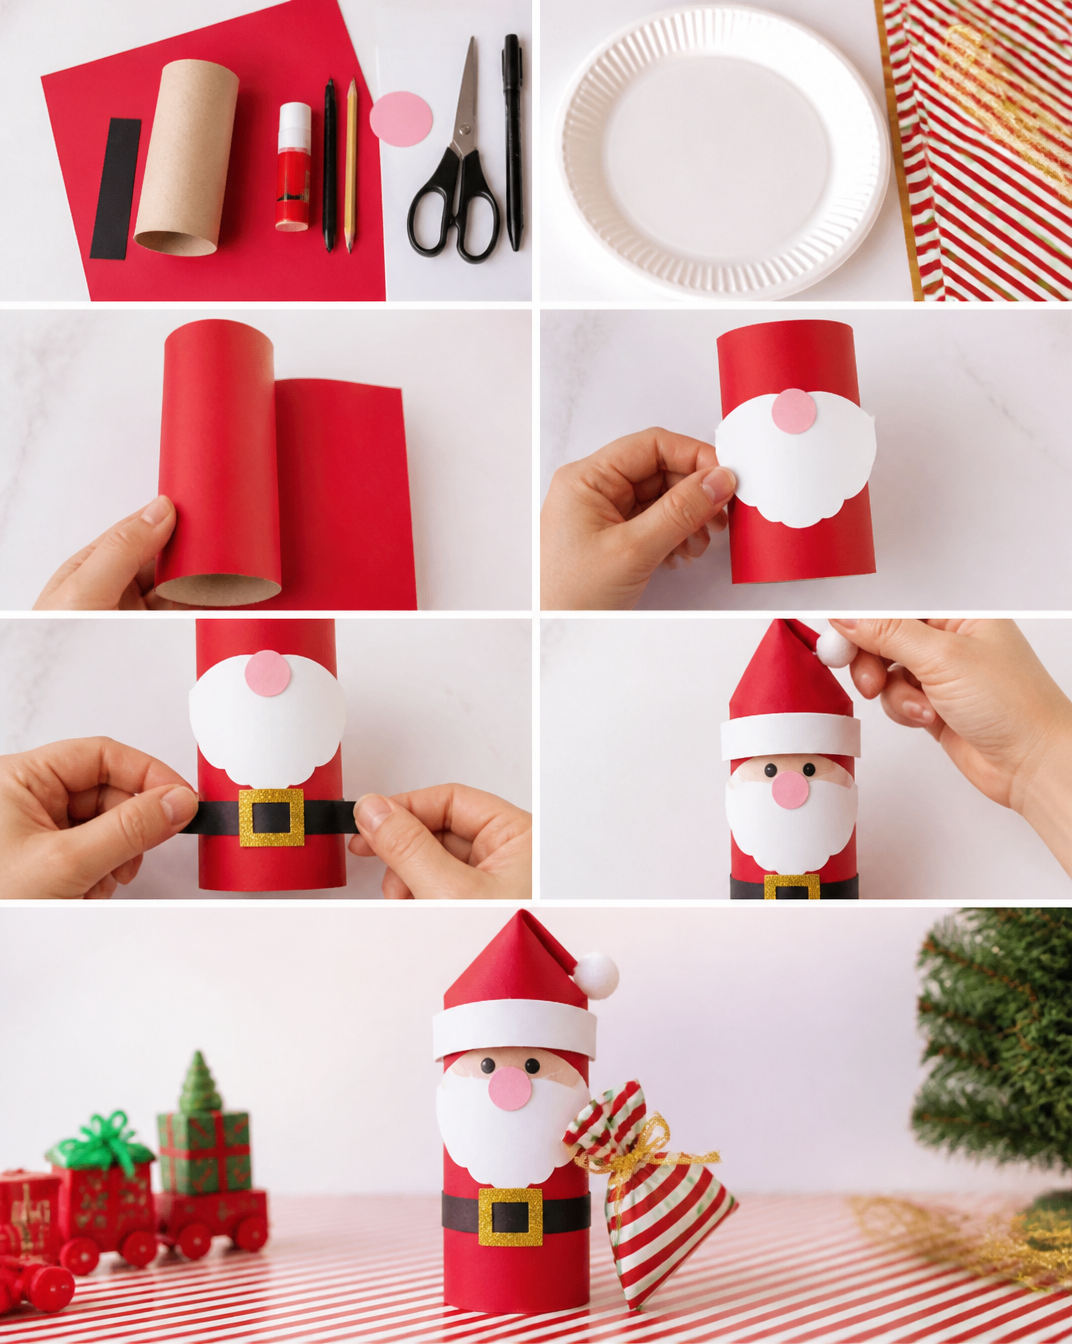
HOW TO MAKE Paper Roll Santa Claus
Step 1: Prepare the Paper Roll
Start with an empty paper roll. You can use a toilet paper tube or a paper towel tube; just ensure it is clean and free of any remnants.
Step 2: Wrap the Roll
Take your red paper and cut it to size. Wrap the paper around the roll and secure it with glue. Make sure the red covers the entire tube, as this will be Santa’s body.
Step 3: Assemble Santa’s Face
Using the Santa Claus template, carefully cut out the elements for Santa’s face from the skin-colored paper, white paper, and black paper. Start by gluing the skin-colored face onto the white red-covered roll, followed by the white beard and moustache pieces.
Step 4: Create Santa’s Hat
Cut the hat shape from the red paper, leaving a little bit of extra paper at the top to create a fold. Glue the hat onto the top rim of the paper roll. Don’t forget to add a fluffy white pom pom at the tip of the hat!
Step 5: Add Facial Features
Use the black marker to draw eyes, a smile, and any extra details you’d like. This is where Santa’s personality shines through!
Step 6: Make Santa’s Legs
For Santa’s legs, cut two rectangles from the red paper. Then, cut two smaller vertical rectangles from black paper to define Santa’s boots. Glue these onto the bottom of the paper roll.
Step 7: Create the Belt
Cut a strip of black felt for Santa’s belt. Attach it around the middle of the roll with glue. Additionally, cut a small rectangle from yellow felt for the belt buckle and attach that to the black belt.
Step 8: Finalize Santa’s Arms
Using the template, cut out two arms. Attach them to the sides of the tube using glue. You can adjust the positioning for a cheerful, waving stance.
Step 9: Add a Present Sack
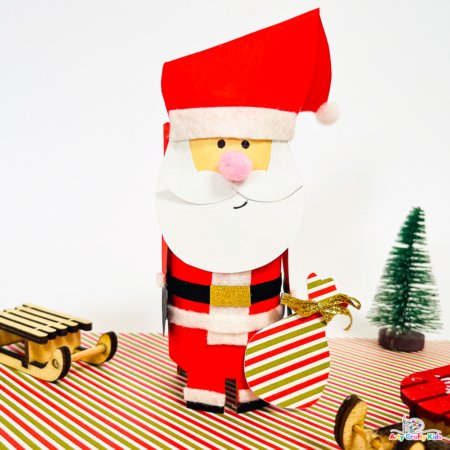
For the final touch, create a small sack using patterned paper. Fold and glue one side, then fill it with a small present or piece of crumpled paper as a placeholder. Tie the top with string and glue it to one of Santa’s hands.
TIPS AND TRICKS
- Choosing Materials: Use what you have on hand or visit a local craft store to find unique decorations.
- Cutting Precisions: Take your time while cutting; neat edges will give your craft a professional look.
- Gluing Techniques: Ensure all glued items are firmly pressed together so they hold when drying.
- Avoiding Common Mistakes: Don’t rush through the assembly; let each piece dry as you go to avoid unsightly smudges.
- Decoration Options: Feel free to add glitter, stickers, or other embellishments for an eye-catching finish!
- Making the Craft Last Longer: Use a sealant if you plan to display the Santa outside or in humid conditions.
- Safety Tips: If children are helping, keep scissors and small embellished items out of reach when not in use.
VARIATIONS AND CUSTOMIZATION IDEAS
- Different Colors: Experiment with other colors for Santa’s clothes; any bright or festive colors can create your unique version.
- Sizes: Create larger or smaller Santas by adapting the paper roll size, such as using a kitchen towel roll for a bigger Santa.
- Seasonal Versions: You could modify this craft for other holidays like a Halloween figure or Easter bunny using the same methods.
- Materials Change: Swap paper for fabric scraps or use different types of felt to get varied textures.
- Personalized Features: Add names or other elements that reflect the person who will receive the Santa as a gift.
Paper Roll Santa Claus FAQ
How difficult is this craft?
This craft is beginner-friendly and easy to follow, making it suitable for all ages and skill levels.
What materials do I need?
You’ll need a paper roll, paper (red, white, skin-colored, black), felt, pom poms, scissors, a glue stick, and a black marker.
How long does it take to make?
The total time for creating this Santa is approximately 30-60 minutes, depending on your crafting speed.
How should I store my Santa after making it?
You can store your completed Santa in a dry, cool place. It’s sturdy but gentle handling will help it last for future holiday seasons!
Can I clean my craft?
Since this craft is made from paper, it’s best to keep it dry. You can dust it lightly but avoid water to prevent damage.
CONCLUSION
The Paper Roll Santa Claus is an easy DIY project that brings joy and creativity to the holiday season. It’s a fun way to decorate your home or create a thoughtful handmade gift. With just a few simple materials and beginner-friendly instructions, you can customize your very own Santa. So gather your supplies and give this budget-friendly craft a try! We’d love to hear about your experience and any unique twists you added!