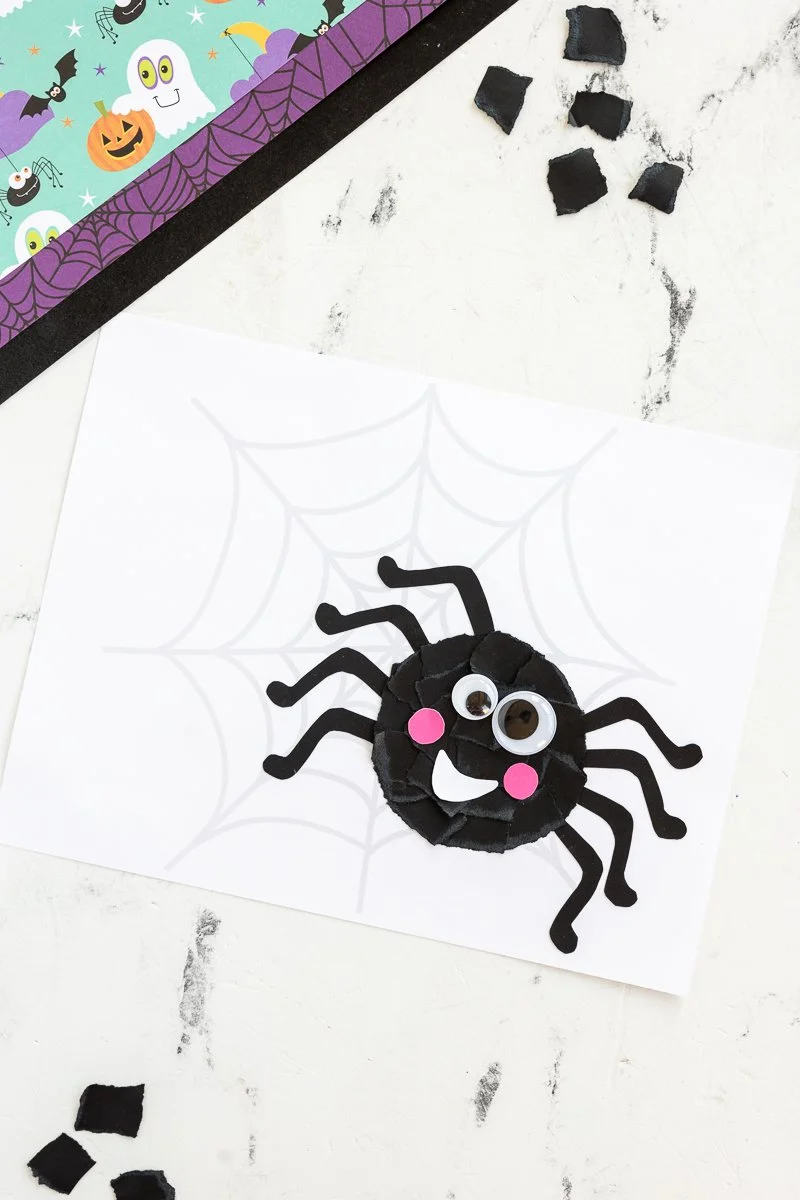
Create a delightful Torn Paper Spider Craft that is perfect for seasonal decorating, specifically around Halloween, or as a fun DIY project for kids. This easy craft is perfect for beginners and doesn’t require any complex skills. With just a few materials and simple steps, you can make an adorable spider that adds a spooky touch to your home decor. This budget-friendly DIY craft is an excellent way to engage children and adults alike while exploring your creativity.
WHY YOU WILL LOVE THIS Torn Paper Spider Craft
You’ll love this Torn Paper Spider Craft for several reasons:
- Easy for Beginners: This craft involves simple materials and steps, making it accessible for everyone, including kids.
- Uses Simple Materials: You only need a few items, which are often found at home or cost very little.
- Budget-Friendly: With minimal costs, this craft is perfect for those looking for affordable creative DIY ideas.
- Quick to Make: You can complete this project in under an hour, making it ideal for short craft sessions or last-minute decorations.
- Great for Home Decor: Perfect for Halloween decorations or can be used as a whimsical touch in children’s rooms.
- Easy to Customize: You can easily change colors or sizes to fit your personal style or seasonal themes.
PROJECT DETAILS
Skill Level
Beginner-friendly. This project is simple and straightforward, requiring no special skills.
Estimated Time
Approximately 30–45 minutes. The crafting time is short, which makes it great for a quick project.
Approximate Cost
Under $10 for all materials. This is a budget-friendly DIY craft that won’t break the bank.
Best For
Great for kids, families, and anyone looking for easy crafts or seasonal decor.
Project Type
This is a fun and creative DIY project focusing on crafting, making it perfect for groups or classrooms.
TOOLS AND EQUIPMENT NEEDED
Scissors
Used for cutting paper into various shapes and sizes, essential for both the body and legs of the spider.
Glue Stick
This will hold the pieces together, making it an important tool to complete your spider securely.
MATERIALS
Black Cardstock Paper
This is the primary material used to create the body and legs of the spider. You’ll tear this into small pieces for the spider’s body and cut out the legs.
Scissors
Essential for cutting the cardstock and other decorative elements. Ensure they are sharp for a clean cut.
Glue Stick
Used to attach all parts of the spider together, including the legs and decorative facial features.
Googly Eyes
These add a fun touch to the spider’s face, giving it character and charm.
Pink Paper for Cheeks
This colorful paper is used to create cute cheeks for the spider, making it more engaging and friendly.
White Paper for the Mouth
This will be cut into a smile shape to enhance the spider’s friendly appearance.
HOW TO MAKE Torn Paper Spider Craft
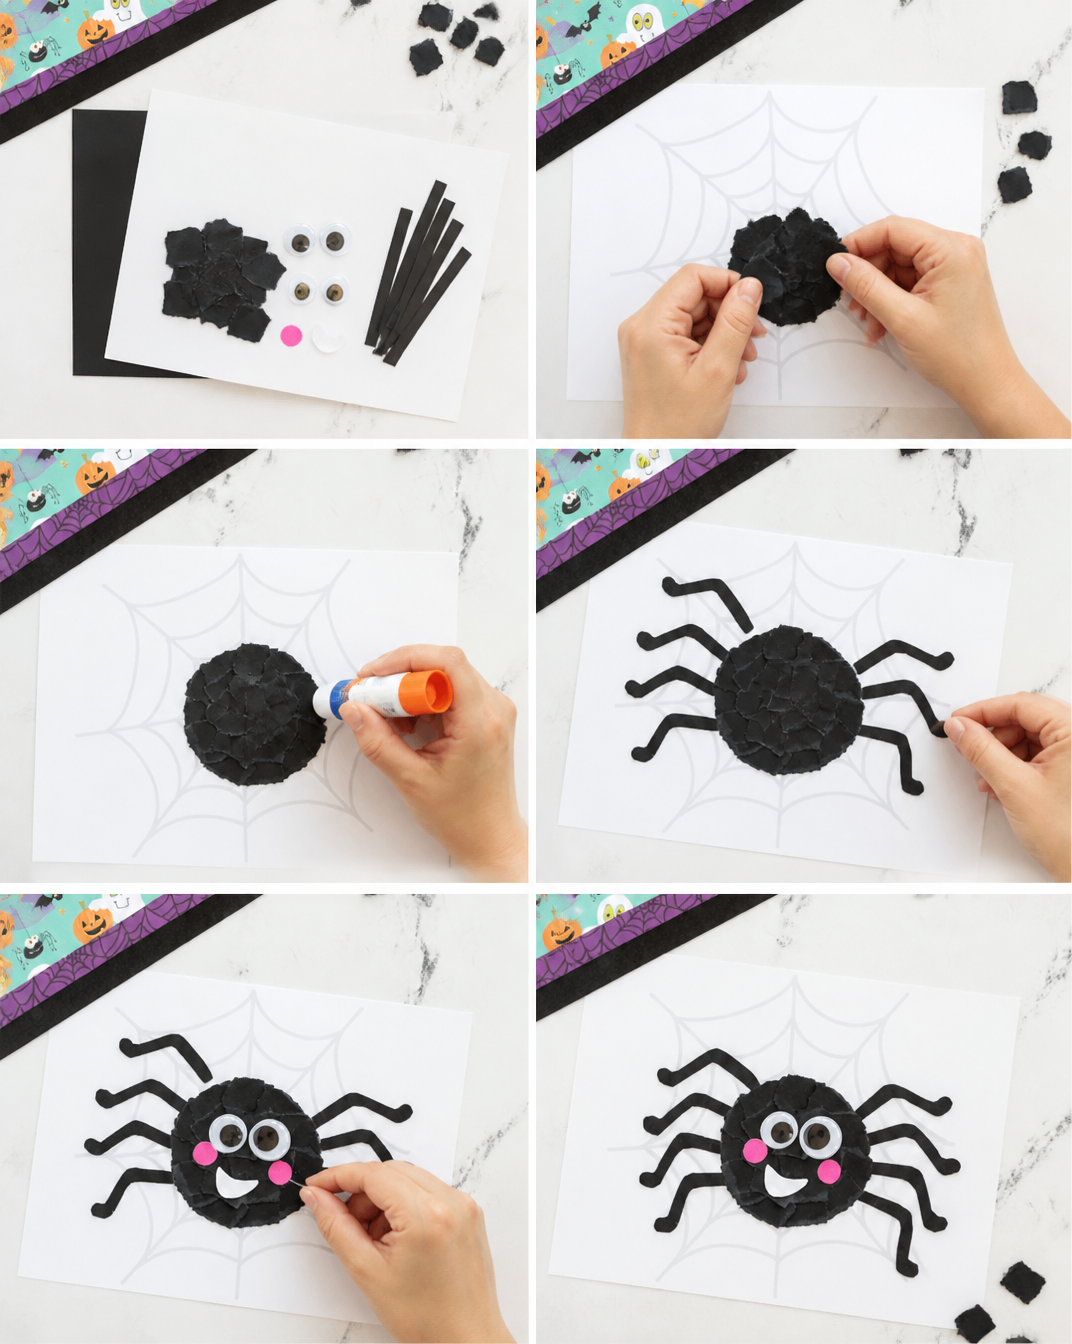
Step 1: Tear Black Cardstock
Begin by tearing your black cardstock into small pieces. You will need a collection of these torn pieces to form the spider’s body. After that, cut out 8 legs and 2 pink cheeks using a spider template if you have one, or by drawing them freehand.
Step 2: Create the Spider’s Body
Next, take your spider web background (which can be created from a larger piece of cardstock or a colorful paper) and trace a large circle onto it. Use your glue stick to attach the torn black pieces in the circle, overlapping them slightly to give the spider’s body texture and depth.
Step 3: Attach the Legs
Now, glue the eight black legs around the body. Ensure to tuck the edges of the legs under some of the torn black pieces for a natural look. Once the legs are in place, attach the googly eyes, a smile cut from white paper, and the pink cheeks to give the spider an adorable appearance.
TIPS AND TRICKS
- Choosing Materials: Opt for cardstock paper for the body as it adds sturdiness. Avoid thinner papers that might rip easily.
- Cutting and Gluing: Use sharp scissors for clean cuts. Let glue dry completely before handling the spider to prevent parts from coming apart.
- Avoiding Common Mistakes: Ensure the spider’s legs are evenly spaced for a balanced look. Don’t rush the glue application; take your time to make it neat.
- Getting a Better Finish: For a more textured appearance, vary the size of the torn pieces used for the body.
- Making the Craft Last Longer: Consider using a clear spray sealant to protect the craft if it will be displayed outside.
- Working Safely: Always supervise children when using scissors and glue.
VARIATIONS AND CUSTOMIZATION IDEAS
There are many ways to customize your Torn Paper Spider Craft:
- Different Colors: Use colored cardstock to create spiders in various colors. You can even make rainbow spiders!
- Different Sizes: Adjust the size of the spider by using larger or smaller circles for the body.
- Seasonal Versions: Create themed spiders, such as a pumpkin spider for Halloween by using orange paper.
- Different Patterns: Use patterned paper for a fun twist or add textures with embellishments like glitter or sequins.
- Personalized Versions: Write the names of family members on the spiders for a personalized touch.
- Hanging Decor: Create smaller spiders and hang them from strings for a fun mobile or web effect.
Torn Paper Spider Craft FAQ
How difficult is the Torn Paper Spider Craft?
This craft is very beginner-friendly and is designed for all skill levels. Even kids can handle this easy DIY project with minimal assistance.
What materials do I need for this craft?
You will need black cardstock, scissors, a glue stick, googly eyes, pink paper for cheeks, and white paper for the mouth.
Can I store the Torn Paper Spider?
Yes! If properly cared for, the spider can be displayed for the entire Halloween season or even reused year after year. Store in a cool, dry place between uses.
How do I clean the Torn Paper Spider?
If it gets dirty, gently dust it with a dry cloth. Avoid water to maintain the glued materials.
How long does it take to complete the craft?
The Torn Paper Spider Craft typically takes about 30 to 45 minutes from start to finish, making it an excellent quick DIY project.
CONCLUSION
The Torn Paper Spider Craft is a fantastic, easy craft idea that combines creativity with fun. Whether you’re making it for Halloween festivities, a themed party, or just for home decor, this beginner-friendly craft invites creativity without the stress of complicated steps or hard-to-find materials.
So gather your supplies and unleash your creativity with this budget-friendly DIY project. Have fun making your own cute spiders, and don’t forget to share your experiences and customization ideas with friends and family! Happy crafting!