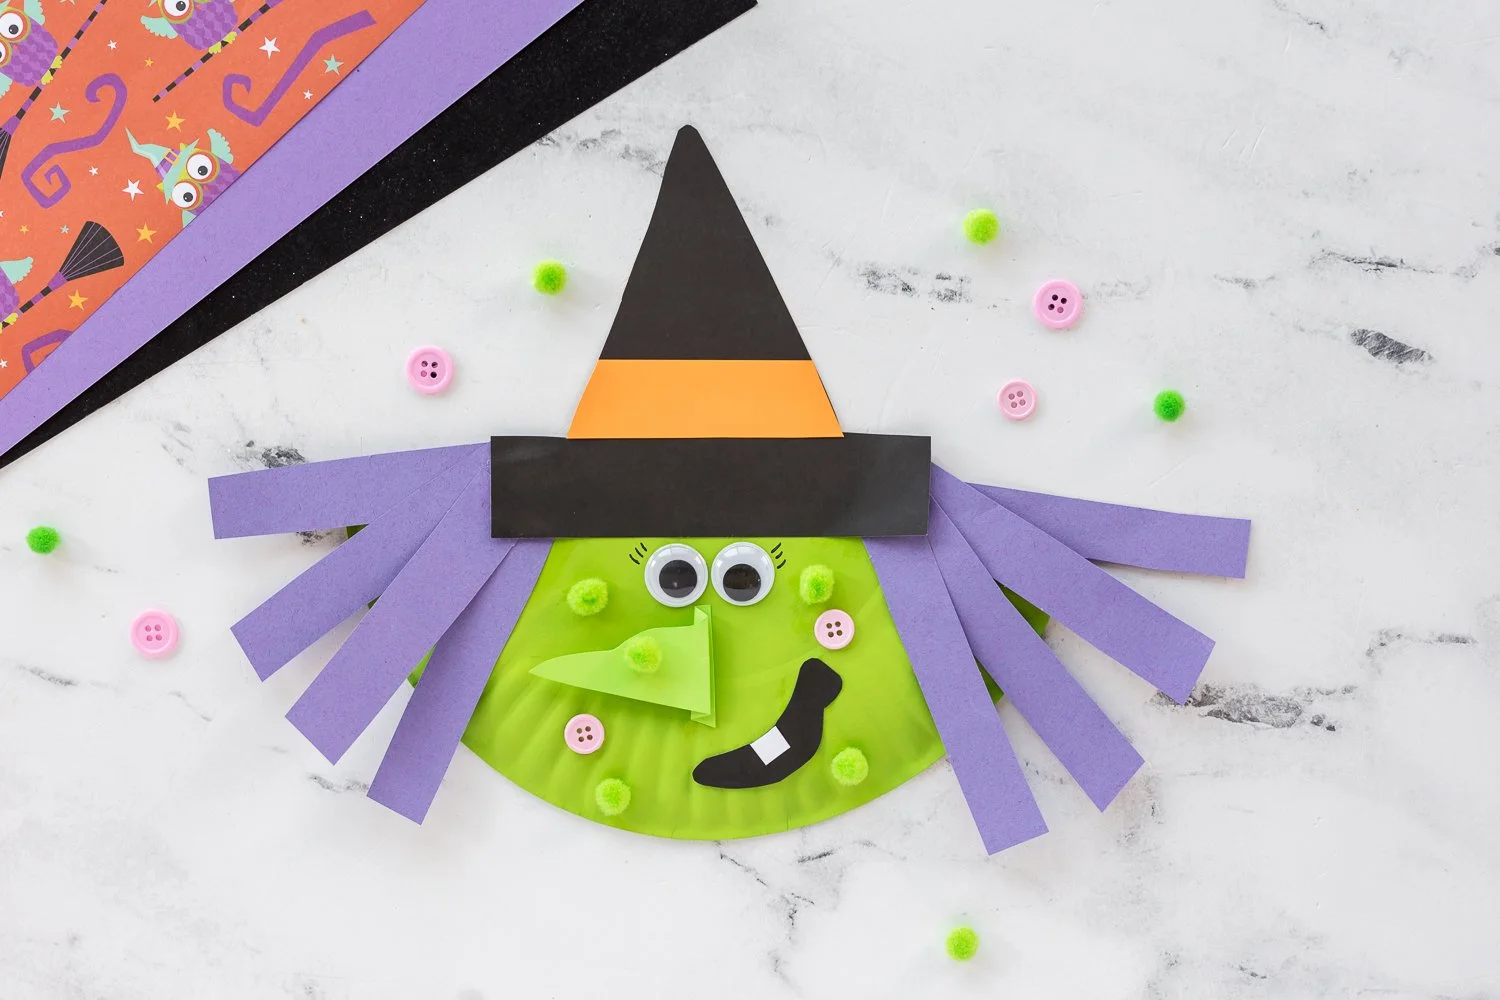
Creating seasonal crafts can be a fun and rewarding experience, especially for those who enjoy working with their hands. One such project that is ideal for both beginners and seasoned crafters alike is the Paper Plate Witch Craft. This easy craft not only allows for creativity but also provides a great opportunity to bond with family and friends. In this article, we will detail everything you need to know about this DIY project, including materials, tools, and step-by-step instructions. Let’s dive into this creative DIY idea that can brighten up any Halloween celebration or autumn decor!
WHY YOU WILL LOVE THIS Paper Plate Witch Craft
Making a Paper Plate Witch Craft is an enjoyable activity that offers numerous benefits. Here are a few reasons why you will love this easy DIY project:
- Easy for Beginners: This craft is perfect for those who are just starting their crafting journey. The steps are simple, and the materials are easy to find.
- Uses Simple Materials: The craft utilizes common household items, making it accessible to everyone without needing a trip to the craft store.
- Budget-Friendly: Keeping costs down is essential for many crafters, and this project can be made on a small budget.
- Quick to Make: You can complete this project in a short amount of time, making it perfect for busy families or quick crafting sessions.
- Great for Home Decor: Once completed, the paper plate witch can serve as a seasonal decoration in your home during Halloween and autumn.
- Easy to Customize: This craft can be personalized with different colors, patterns, and embellishments, allowing for unique creations.
PROJECT DETAILS
Skill Level
This project is beginner-friendly, making it accessible for all age groups. Whether you are crafting with kids or trying it out yourself, this easy craft welcomes all skill levels.
Estimated Time
The estimated time for completing this Paper Plate Witch Craft is about 30–45 minutes, depending on how much detail you want to include.
Approximate Cost
The approximate cost is around $5–10, mainly due to the inexpensive materials used, which are often already available at home.
Best For
This craft is great for families, classrooms, or anyone wanting to engage in quick and enjoyable crafts for holidays or seasonal decorating.
Project Type
This is a straightforward, no-sew craft that falls under the category of DIY home decor and seasonal crafts.
TOOLS AND EQUIPMENT NEEDED
Scissors
Scissors are essential for cutting the paper plates and any additional materials you may want to use for decoration.
Glue Stick or Craft Glue
This tool is used for attaching various components together, ensuring your craft holds up well.
Paintbrush or Sponge Brush
This is used for applying paint evenly onto your paper plate and other decorative elements.
MATERIALS
Paper Plates
These are the main base of your craft. You will use them to create the witch’s face and body.
Black Paint
Black paint is essential to color your witch’s hat and other components. You can use acrylic or tempera paint.
Construction Paper
Different colored construction paper will allow you to create vibrant and varied features for your witch, such as hair and facial details.
Googly Eyes
These add a fun and whimsical touch to your witch craft, bringing your character to life.
Markers
Markers are handy for adding fine details and personalizing your craft further.
Optional: Glitter or Stickers
These decorative items can add a sparkle or fun texture to your witch, though they are not necessary for the project.
HOW TO MAKE Paper Plate Witch Craft
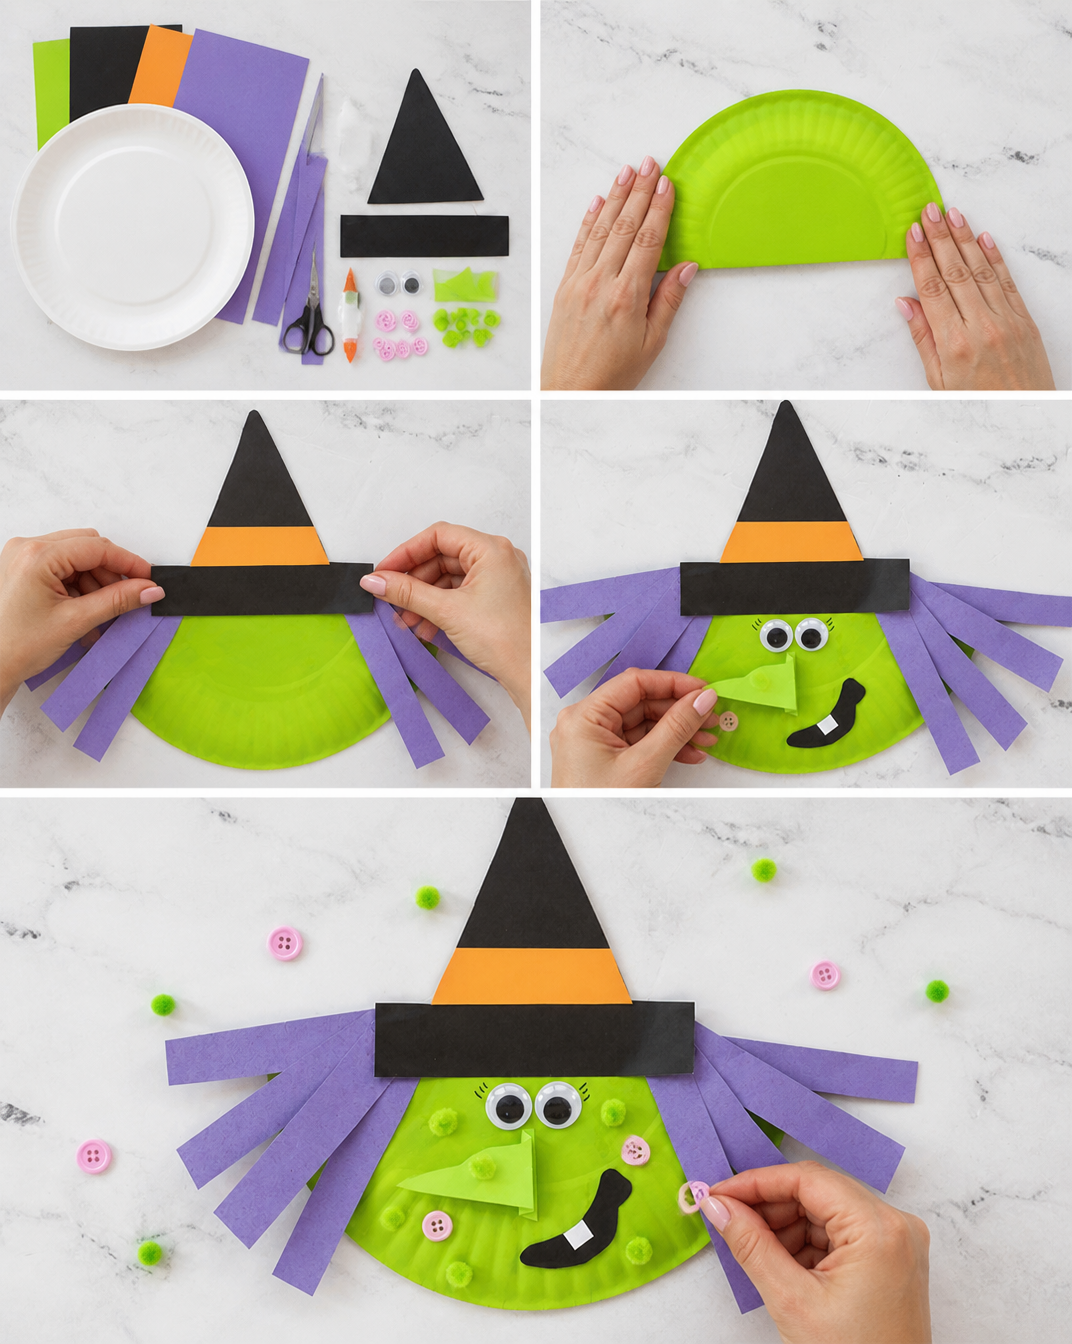
Creating your Paper Plate Witch Craft is a straightforward and enjoyable process. Follow these steps to bring your witch to life!
Step 1: Prepare Your Plates
Begin by gathering all your materials. Take one paper plate and paint it black using a paintbrush or sponge brush. This will form the witch’s hat. Allow it to dry completely.
Step 2: Create the Witch’s Face
While the hat is drying, take another paper plate for the witch’s face. Use green paint to create a face or marker to add features directly. Once dry, glue on googly eyes for a playful effect.
Step 3: Make the Hat
Once the painted plate is dry, carefully cut out a triangle shape to form the witch’s hat. This cut should be about one-third of the plate and comes to a point at the top.
Step 4: Attach the Features
Using construction paper, cut out hair and facial features. Glue these pieces onto the painted plate, completing the face. Feel free to get creative—different hair colors and styles add uniqueness.
Step 5: Assemble Your Witch
After attaching the features, place the triangle hat on top of the witch’s head (the first plate). Use glue to secure it.
Step 6: Add Final Touches
Finally, if desired, sprinkle some glitter or add stickers for extra flair. Allow everything to dry.
TIPS AND TRICKS
- Choosing Materials: If you have other craft supplies handy, consider using them to personalize your witch even more. Materials like fabric scraps or ribbons can totally transform the look.
- Cutting Techniques: When cutting the hat shape, make small, controlled cuts to ensure you get a clean edge. This will improve the overall look of your witch.
- Glopping Glue: Use just enough glue to ensure it holds without overgluing, which can make your craft messy.
- Finish Quality: For a more polished finish, paint multiple coats and allow ample drying time between each coat.
- Save Money: Check your recycling bin for unused paper or packaging materials that can be adapted into your project.
- Durability: While paper plates are sturdy, be sure to handle your craft carefully, especially if you decide to hang it up.
- Safety: If crafting with children, supervise them during cutting and gluing.
VARIATIONS AND CUSTOMIZATION IDEAS
- Different Colors: Experiment with colors other than traditional green and black. Pink or blue witches can be equally fun and whimsical!
- Sizes: Consider using different-sized plates to create various sizes of witches for a grouped display.
- Seasonal Versions: Customize your witch for other holidays, like turning it into a pumpkin for fall or a ghost for Halloween.
- Different Patterns: Instead of a plain witch hat, why not add stripes or dots? Use washi tape for geometric designs!
- Personalized Versions: Add names or personalize the witch with fun sayings written in markers, making them great gifts or party favors.
Paper Plate Witch Craft FAQ
Q1: How difficult is this craft?
A1: This craft is quite easy, making it perfect for beginners, children, and crafters of all ages.
Q2: What materials do I need?
A2: You will need paper plates, black paint, construction paper, glue, googly eyes, and optional markers or glitter for decoration.
Q3: Can I hang the completed craft?
A3: Yes! With a little extra tape or string attached to the back, it can be hung as festive decor for Halloween or autumn.
Q4: How long does it usually take to make?
A4: The crafting process usually takes around 30 to 45 minutes, including drying time for paint.
Q5: Is it suitable for outdoor use?
A5: Due to the use of paper plates and paint, this craft is best suited for indoor use, as moisture can damage it.
CONCLUSION
Creating a Paper Plate Witch Craft is an enjoyable, easy, and budget-friendly DIY project that perfectly fits the Halloween season. Whether you are decorating your home or engaging in a fun activity with children, this beginner-friendly craft offers numerous avenues for creativity and customization. Its simple materials and straightforward steps make crafting time a delightful experience. So why wait? Gather your materials, let your imagination soar, and share your unique creations with friends and family! Share your experience, finished projects, or customization ideas to inspire other crafters. Happy crafting!