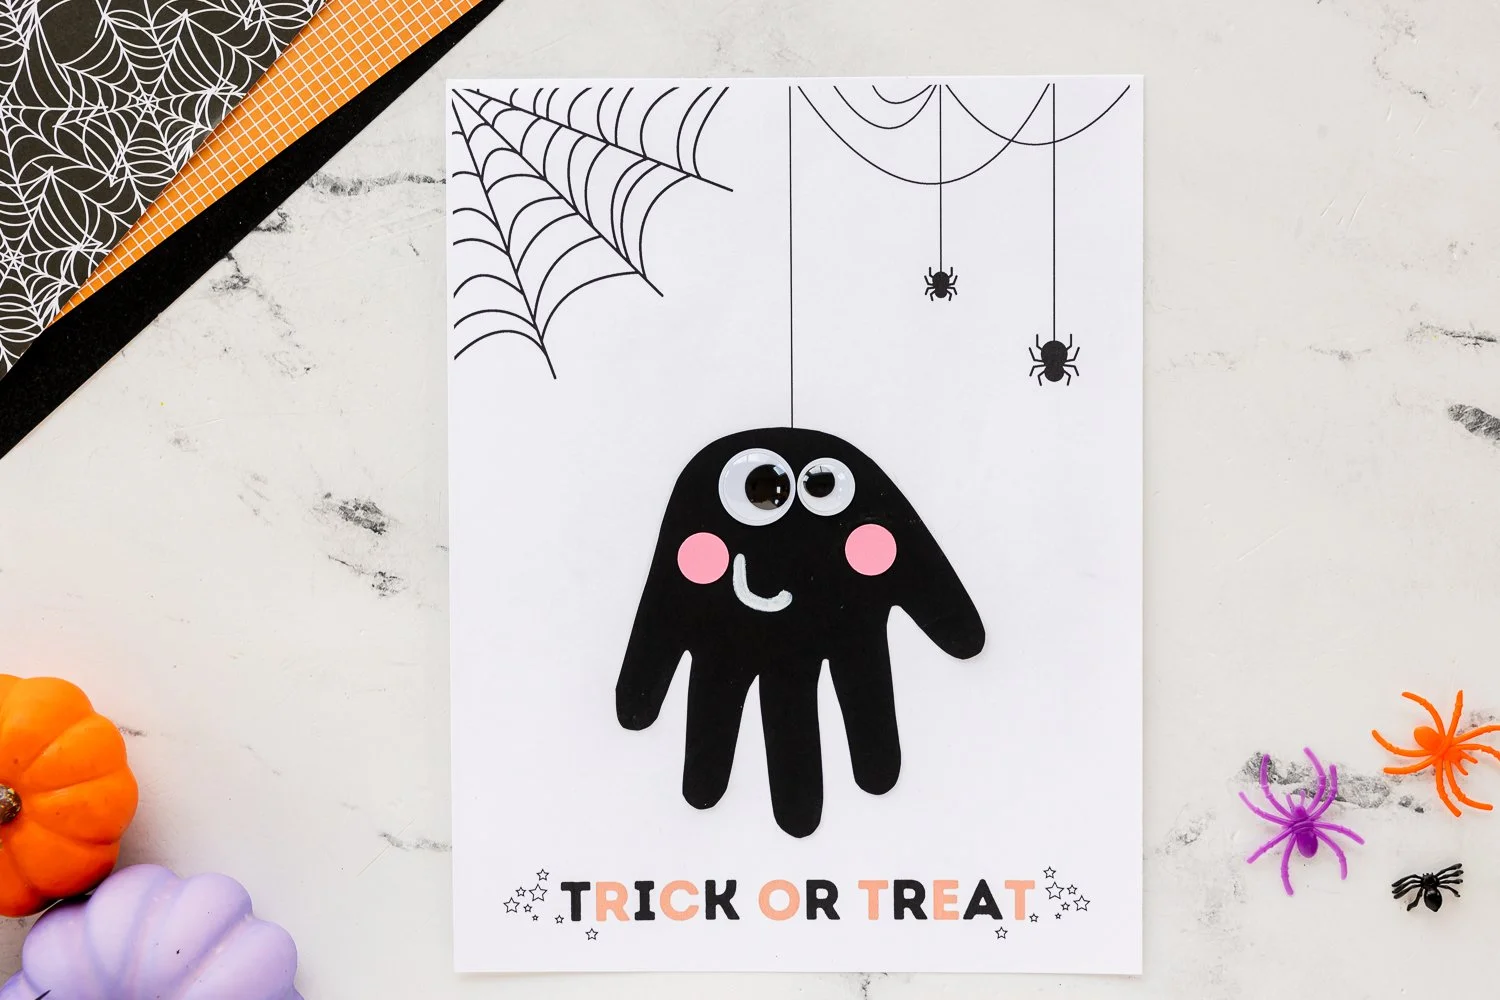
Are you looking for an easy craft that you can quickly create with your kids? The Handprint Spider is the perfect DIY project for a fun and simple craft session! This craft uses basic materials, is budget-friendly, and is ideal for beginners of all ages. It also makes a delightful addition to your homemade decor for Halloween or other seasonal celebrations. Get ready to make some creative decorations with this easy DIY project!
WHY YOU WILL LOVE THIS Handprint Spider
This Handprint Spider craft is a fantastic choice for many reasons. First, it is easy for beginners and can be completed in just a short time. Using simple materials that you might already have at home makes this a budget-friendly DIY that doesn’t break the bank. Additionally, the craft can serve as a playful decoration for your home or make a unique handmade gift for friends and family.
The Handprint Spider is highly customizable, allowing you to play with colors and designs or even create variations for different holidays. You’ll also enjoy the joy of creating a fun and spooky decoration just in time for Halloween!
PROJECT DETAILS
Skill Level
Beginner-friendly
This craft is suitable for beginners, making it perfect for kids or anyone new to DIY projects.
Estimated Time
30 minutes
You can complete this simple craft in about half an hour, making it great for quick crafting sessions.
Approximate Cost
$5 – $10
The materials used are inexpensive, often found at home, making this an affordable DIY.
Best For
Home decor, holidays
The Handprint Spider is an excellent decoration for Halloween and other festive occasions.
Project Type
Seasonal crafts
This project fits perfectly into seasonal craft ideas, especially for spooky themes.
TOOLS AND EQUIPMENT NEEDED
Scissors
Essential for cutting out the handprint shape from the cardstock and any additional design elements.
Glue Stick
Used for attaching the various parts of the spider together, ensuring everything stays in place.
White Paint Pen or Marker
Ideal for adding facial features like a smile to your spider, giving it a friendly look.
MATERIALS
Printable Spider Web Template
This template provides a fun outline where your handprint will become the spider’s body, making crafting simple and organized.
Black Cardstock
Used to create the spider’s handprint body; it gives the spider a classic and spooky appearance.
Pink Cardstock
Cut into small circles, adding a bit of color for cheeks, giving your spider a nice pop and cute personality.
Googly Eyes in Different Sizes
These are great for adding personality to your spider by making it look lively and fun.
Scissors
Essential for cutting out the shapes for your spider and any decorative elements.
Glue Stick
Used for securing parts together. An easy-to-use adhesive perfect for this simple craft.
White Paint Pen or Marker
Allows you to add details like a smile or spider web lines, enhancing your spider’s overall look.
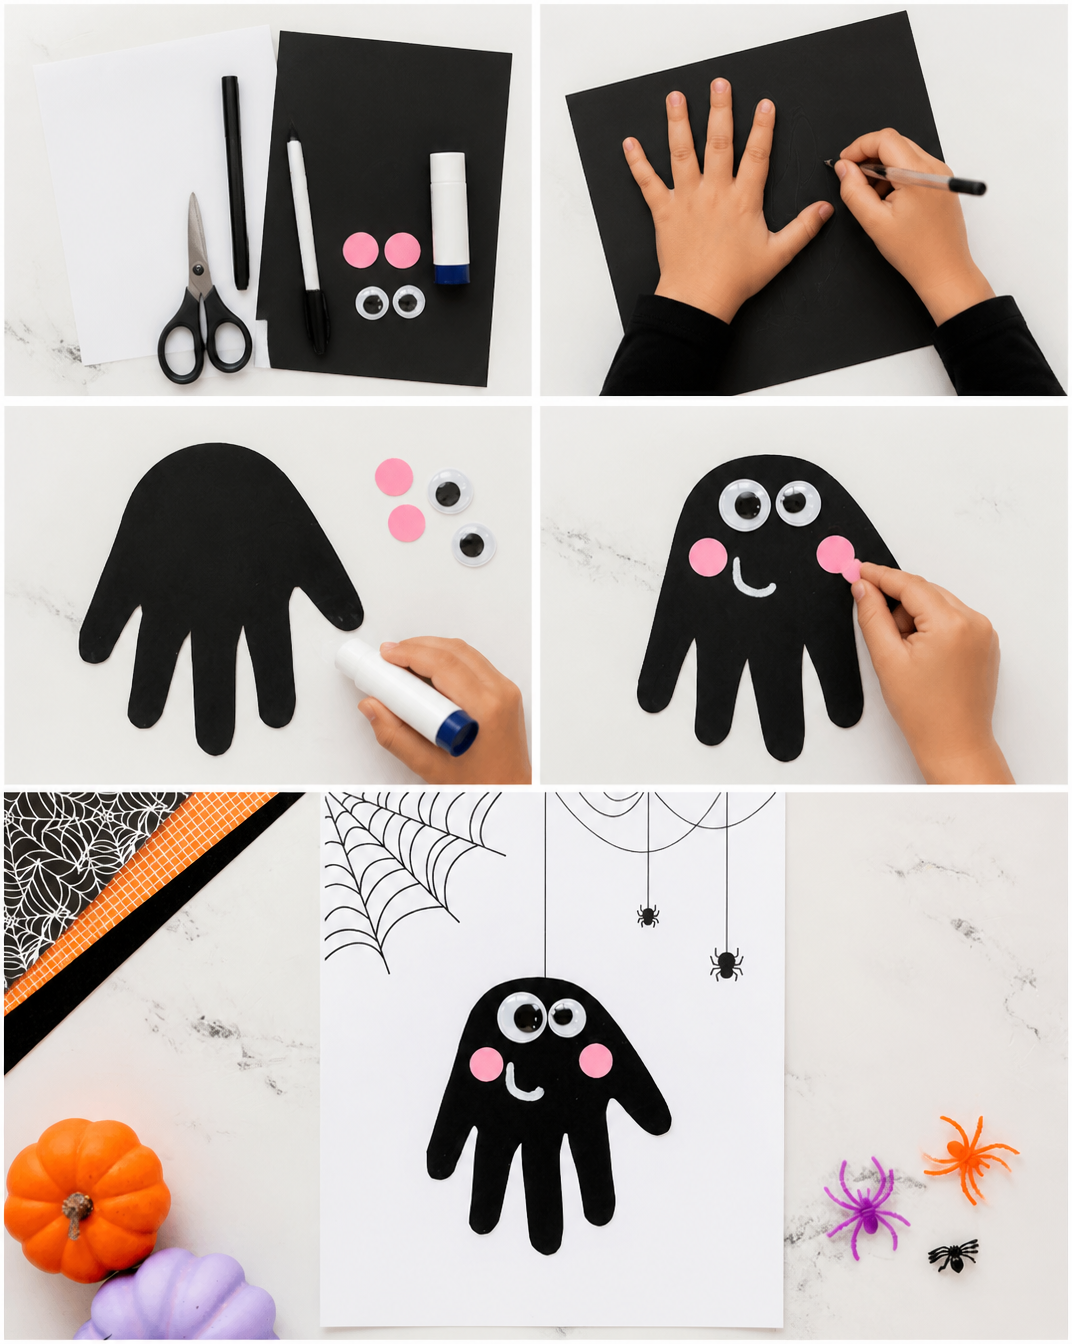
HOW TO MAKE Handprint Spider
Creating a Handprint Spider is straightforward and fun! Follow these simple steps to craft your spooky decor.
Step 1: Print and Prepare the Template
Start by printing the spider web template. This serves as the backdrop for your spider and helps in positioning your handprint.
Step 2: Trace Your Handprint
Take a piece of black cardstock and trace your child’s hand. Make sure to position the fingers pointing downward, as these will form the spider’s legs.
Step 3: Cut Out the Handprint
Carefully cut along the traced lines to create the handprint shape. You may want to have an adult handle this part for safety.
Step 4: Create the Spider’s Face
Using pink cardstock, cut out small circles and glue them onto the handprint where the fingers meet. These will act as the spider’s cheeks.
Step 5: Add Googly Eyes
Glue several googly eyes onto the handprint to create a fun and lively spider face. Mix different sizes for added character.
Step 6: Draw the Smile
Take your white paint pen or marker and draw a cute smile on the spider’s face. You can also add festive details like web lines or more decorations on the template.
Step 7: Assemble Your Decoration
Now, position your handprint spider on the printed spider web template, gluing it down securely. Let everything dry before displaying.
Step 8: Display Your Craft
Find a suitable place to show off your Handprint Spider! Whether it’s hanging on a wall, a door, or on a festive table, it’s sure to bring smiles.
TIPS AND TRICKS
- Choosing Materials: Ensure your cardstock is thick enough to give structure to your spider. You can use recycled materials, which is a great budget-friendly option.
- Cutting and Gluing: For a cleaner cut, use sharp scissors. When using glue, stick to a thin layer to avoid mess.
- Avoiding Common Mistakes: Ensure the handprint is traced clearly, so you have a good shape to cut. If the paint pen is too thick, it may smudge, so use it sparingly.
- Getting a Better Finish: If you want more vibrant colors, try using colored cardstock or paint instead of paint pens.
- Safety Tips: Always supervise children when using scissors or sharp tools. For younger kids, help them with cutting and using the glue.
- Making it Last Longer: Displaying the craft safely indoors away from direct sunlight will help preserve its colors against fading.
VARIATIONS AND CUSTOMIZATION IDEAS
- Different Colors: Instead of black, use purple or orange cardstock for a less traditional, yet vibrant spider.
- Seasonal Versions: Create an ice spider for winter by using white cardstock and adding some glitter.
- Holiday Versions: For Thanksgiving, turn the spider into a turkey by adding feathers from colorful cardstock.
- Add Textures: Use fabric pieces for the spider body or glitter for an extra sparkly touch.
- Create a Family of Spiders: Make different sizes by tracing larger or smaller hands, letting families create their own unique spiders.
- Personalized Versions: Write your child’s name on the spider’s web or customize facial features to resemble family traits.
Handprint Spider FAQ
How difficult is the Handprint Spider craft?
This craft is very easy and is perfect for beginners of all ages. It requires basic skills in tracing and cutting.
What materials do I need for the Handprint Spider?
You will need black and pink cardstock, googly eyes, a glue stick, scissors, and a white paint pen or marker. A printable spider web template will also be helpful.
How long does it take to make this craft?
You can easily complete the Handprint Spider craft in about 30 minutes, making it a quick and enjoyable activity.
Is this craft safe for young children?
Yes, it’s suitable for children as long as an adult supervises them when using scissors for cutting.
How can I store the finished Handprint Spider?
To preserve your Handprint Spider, store it flat in a dry area, away from direct sunlight. You can keep it in a craft box or drawer.
CONCLUSION
The Handprint Spider is an easy DIY project that combines creativity with fun. Using simple materials, it is perfect for beginners and lets you and your kids craft a delightful, seasonal decoration. The project is not only budget-friendly, but it also provides an exciting way to personalize your home decor for Halloween or make handmade gifts. Don’t hesitate to try out this easy craft idea with your family, and feel free to share your finished projects or any variations you’ve made! Happy crafting!